Positive pay for banks
By stopping fraudulent checks from posting to accounts, businesses can protect themselves and minimize loss. Given the ease of paying by check, Positive pay is one of the most effective tools businesses use to prevent check fraud. It gives organization users the ability to monitor items posted to accounts, pay an issued item, or return an item if it doesn’t match the record in core. Using Positive pay in Banno Online, organization users can:
- Upload files with check details
- Manually enter check details
- Work check exceptions
Depending on the number of enabled payment entitlements, Positive pay displays individually or in a drop-down under Payments in the app’s navigation menu.
Enable Positive pay
In User management, an admin user must enable the Positive pay entitlement and permissions for an organization user.
Dashboard
The Positive pay dashboard displays uploaded check lists and manual check entries with their status. From the dashboard, organization users also upload, review, and approve entries. They can only view entries for up to seven days. After seven days, entries are removed from the dashboard. When an organization user successfully uploads a file or manually adds checks, each entry displays the following:
- Entry name
- The manually entered name ARPManualEntry_[username]_[upload date].txt that is automatically assigned or the uploaded CSV file name.
- Associated account
- When an organization user uploads a check or file, they select a pay-out account for the issued items. If the upload is successful and the entry posts on the dashboard, the account name and last four digits of the account display.
- Status
- Depending where an entry is in the transmit process to core, it’s in one of the following statuses:
- Pending
- An entry with a Pending status has issued items that are yet to be reviewed, approved, and sent to core. Pending entries have the text Review & approve display, which takes the organization user to the Review checks window.
- Uploaded and approved
- An entry changes from Pending to an Uploaded and approved status after the organization user reviews and approves the issued items, which sends the issued items to core to be paid.
- Unapproved
- An entry changes from Pending to an Unapproved status if the entry is not reviewed and approved before uploading a subsequent file or manual check entry. Unapproved files cannot be reviewed and approved, and the file should be uploaded or the check(s) manually entered again.
- Date counter
- The date counter tracks the number of days since the entry was uploaded or manually entered.
If no files have been uploaded nor checks manually entered, the message Your check uploads will display here appears on the dashboard.
Upload issued items
To save time, organization users have the option to upload a CSV file with issued item details. Selecting Add checks takes the organization user to the Add checks window. In this window, they choose an associate account and upload their CSV file. The CSV file should follow the app’s formatting specifications, which the organization user can know by selecting View CSV formatting guide in the same window. After a successful upload, the file displays as an entry on the Positive pay dashboard.
CSV template formatting guide
Organization users can upload a CSV file containing a list of issued items. Columns in the CSV file should adhere to the following formatting specifications:
- Item number
- The check number listed on the check. This field is required when uploading a CSV file.
- Item amount
- The amount listed on the check. This field is required when uploading a CSV file. Format the specific item amount as
x.xxwithout commas or a currency sign. - Issue date
- The date on a check that will be or was issued. If the issue date is included in the CSV file, the field should be formatted as
mm/dd/yyyy. - Payee
- The person or business to whom the check is issued to.
- Void indicator
- The void indicator stops the check’s ability to debit an account. If the field in the CSV file is blank, the check is considered a non-voided check and funds will still transfer. If a check is considered void and the void indicator field is included in the CSV file, the field should be formatted as
V(V= void). - Account type
- The type of account associated with the account number. If the account type is included in the CSV file, the field should be formatted as
Chk,Sav, orGL. The account type options are the following:Chk= checkingSav= savingsGL= general ledger - Debit/credit
- The type of action—withdrawing or adding funds—occurring to the account. If a check is noted as debit or credit in the CSV file, the field should be formatted as
DorC. The debit/credit options are the following:D= debitC= creditThe credit option is for institutions that use Core Director. These institutions must always populate the field with
C, because Core Director uses a debit to credit balancing system when determining exceptions. - Void date
- The date that a check lost the ability to debit an account. If a check has a void date in the CSV file, the field should be formatted as
mm/dd/yyyy. - Payee address 1
- The payee’s street address.
- Payee address 2
- The payee’s building, suite, apartment, etc. number.
- Payee address 3
- The payee’s city and state.
- Payee address 4
- The payee’s zip code.
- Stop indicator
- The stop indicator signifies whether or not a payee can deposit or cash the check. If the field in the CSV file is blank, the stop indicator is considered no, and the payee can deposit or cash the check. The field should be formatted as
Stop(Stop= yes) if a payee needs to be prevented from depositing or cashing a check.An organization shouldn’t rely on Positive Pay to stop a check from paying. An organization user will need to apply a stop payment on the item.
Formatting tips
If applicable, follow these guidelines for correctly formatting the CSV file:
- Fields are not case sensitive. For example, a check with a void indicator can be uppercase
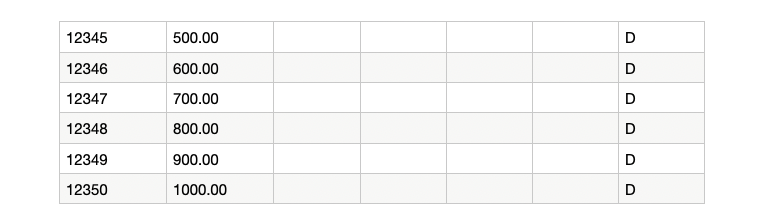
Vor lowercasev. - The top row in the CSV file contains field information and not header titles. See the example below.
- If there’s no information in a column, leave the column blank in the CSV file. See the example below.
Choose associated account
In the Add checks window, an organization user chooses the pay-out account for issued checks by selecting Choose associated account. The Select account window then displays all of the organization’s business accounts, and the organization user can filter by the type of account (savings or checking). If the organization has only one type of account, the filter button doesn’t display.
After an account is selected, a call to the API determines whether the account is Positive pay eligible. If the selected account’s eligible, the organization user is navigated back to the Add checks window where they’ll see the account name and last four digits of the account. If the organization user selects an ineligible account, a message notifies them that the account is not enrolled in Positive pay, and they need to select a different account. The ineligible account and message still displays, but the account is no longer selectable as an associated account. For an account to be Positive pay eligible, global parameters and account setup must occur in core.1
Review and approve issued items
The organization user can review and approve checks directly after uploading a CSV file or manually entering issued items. They can also select Review & approve on the entry listed on the dashboard. When they review and approve checks, they’ll view the Review checks window. This window displays the upload summary, including the following:
- Account
- For manually entered issued items, the pay-out account for the issued items that the organization user selected. If the organization user uploaded a CSV file, the field doesn’t display.
- File name
- For an uploaded CSV file, the file’s name. If the organization user manually entered issued items, the field doesn’t display.
- Total items
- The number of populated rows in the CSV file, or the number of manually entered checks.
- Total amount
- The accumulated dollar amount of all checks.
- Check details
- The check information provided in the CSV file, or the manually entered issued item information. If a date displays, this indicates that an issue date was provided. If a check icon displays, the issued date wasn’t provided.
For an uploaded CSV file, the organization user can select Approve or Cancel. Once the file’s approved, the organization user cannot stop the file from sending to core. If there is an incorrect check detail, the organization user should click Cancel, correct the detail in the file, and re-upload the file.
Manually add issued items
- Add checks
- Add your checks manually
- select account
- enter and review check
Organization users can manually add issued items by first selecting Add checks on the Positive pay dashboard. This opens the Add checks window where the organization user clicks Add your checks manually and then selects a pay-out account for the issued item. After selecting a pay-out account, the Enter check window displays for the organization user to enter the following issued item details:
- Check number
- The number listed on the upper right-hand side of the check.
- Check amount
- The amount listed on the check.
- Payee
- The person that receives an issued item’s payment.
- Type
- An issued item’s Type can be Debit, Credit, or Void.
- Debit
- The check amount withdrawn from the account.
- Credit
- The credit option is for institutions that use Core Director. These institutions must always populate the field with Credit, because Core Director uses a debit to credit balancing system when determining exceptions.
- Void
- The check amount ceased to be debited.
- Check date
- Using the Check date calendar, the organization user selects the issue date that displays on the check.
After manually adding a check, the organization user can add additional checks by clicking Save and enter another. Once all of the check information has been entered, clicking Review allows the organization user to review and approve the issued items.
If the organization user’s session in the Banno app times out, any information they entered and don’t approve will not be saved. If an organization user plans to take a break from adding issued items or is interrupted, they need to first upload and approve all issued items.
Review and approve checks
After the organization user selects Review & approve of an entry listed on the dashboard, they’ll view the Review checks window. This window displays the entered check information for an organization user to confirm accuracy. The organization user can select Enter another to manually add an additional check, or they can select Approve. If the organization user selects Approve, a second confirmation dialogue displays the total number of checks that will be approved, as well as an Approve button to send the file to core or a Go back button to edit the check(s). Once the checks are approved, the organization user can no longer edit the check(s) or stop the check information from sending to core.
When issued items are successfully submitted, a success message displays. If issued items are unsuccessfully submitted, an error message displays. The organization user will need to review and approve the checks again.
Duplicate issued items
If an organization user uploads a duplicate file or adds a duplicate issued item, a message displays notifying the organization user that checks in the file might be duplicate or previously approved. The organization user can choose to approve the issued item(s) or not.
View issued items
Once a file has been uploaded and approved, the institution can view the issued items on core. The institution cannot see items in a specific uploaded file as it is one core file that contains all issued items.
Modify issued items
Once items are uploaded or manually entered and approved, the institution can view and modify an item. An organization user cannot modify issued items, except for voiding. The organization user can include the same item in a separate file with void being indicated and it will change on the core.
Work exceptions
Working Positive Pay check exceptions determine whether to pay or return issued checks. If there are no exceptions to view or work, once clicked, Work exceptions returns zero exceptions. If a posted item doesn’t match the recorded item, then the organization user manually decides to pay or to return the item.
When check exceptions display on the Positive pay dashboard, Work exceptions displays and notifies the organization user of flagged checks needing review; a tally of the total number of work exceptions that an organization user needs to work also displays. If there are no work exceptions, Work exceptions doesn’t display .
After selecting Work exceptions, the Work exceptions screen displays a list of all checks flagged as exceptions for the organization user to choose to pay. Exceptions are displayed per account. To view exceptions for another account, the organization user can select the Account field at the top to switch accounts and work those exceptions.
Depending on the size and number of checks submitted, it may take a while for check exceptions to display on the dashboard. If applicable, a check exception displays the following:
- Amount
- The submitted amount that is trying to post to the pay-account account number.
- Account number
- The pay-out account number the exception is trying to post to.
- Payee
- The person or business to whom the check is made out.
- Exception status
- The current decision status on the exception item that can be Return or Pay.
- Return
- An unselected check has a Return exception status and will not be paid.
- Pay
- A check that is selected has a Pay exception status and will be paid.
At the bottom of the window, the number of Returning and Paying checks display. After the organization user determines which checks to return or pay, they select the Submit button. If exceptions are worked outside of the cut-off time, each exception is in a locked state. During this time, checks and their pay or return status cannot be changed or submitted. If the organization user can select the exception, they can review—or print—the following check information (presented by the entity requesting funds) in the Check details window:
- Payee
- The name on the check that is submitted by the organization.
- Captured payee name
- The person or business on the check that is being presented.
- Amount
- The presented amount that is trying to post to the pay-out account number.
- Images
- If available, an organization user can view the front and back images of the check. If check images are unavailable, the message There are no images included with this check displays.
- Account name
- The payout-account name that the exception is being presented—–debited—–against.
- Check number
- The check number that is presented for payment.
- Source of Entry
- How the check is being presented for payment.
- Exception reason
- The explanation for why the core flagged the presented check for review.
- Invalid amount
- The issued check amount doesn’t match the amount presented for payment.
- Paid no issue
- A presented check that has not been issued yet is trying to clear.
- Payee mismatch
- The presented payee name does not match the issued payee name.
- Voided item
- A check is being presented that the business has voided.
- Stale date
- A check that is presented for payment so many days post the issue date. The stale date is set in core and varies from institution to institution and can vary from account to account.
- Zero serial number
- The presented check has a serial number with one or multiple zeros.
- Duplicate
- A presented item that has already been paid.
- Update by
- The most recent individual who worked the exception item. This can be an organization user in Banno Online or an institution employee on the host.
- Time updated
- The most recent time an individual worked the exception item.
- Workstation
- This field relates to the most recent individual who worked the exception item.
- Protected
- The core determines whether or not the check exception can be worked.
- No
- The organization user can interact with the exception and work the issued check.
- Yes
- A lock icon displays in the check details. When an exception is locked, an organization user can only view the exception and cannot work it. Reasons for a protected exception can include if it is past the cut-off time or if the organization’s account is set up with certain exception reasons. Sometimes the transaction code on the check transaction prevents it from working in digital banking.
- DDA Batch number
- The number related to the incoming clearing file that the check was submitted in.
- DDA sequence number
- The ID number related to the presented transaction in the DDA batch.
Only check details included in the issue items file sent to core will display. The core doesn’t auto-fill or return information that wasn’t first uploaded or entered.
In the Check exceptions window, an organization user switches between pay-out accounts by selecting the account that displays. In the Select account window, the list of pay-out accounts and a tallied number of exceptions displays for each account, and a green checkmark indicates the current account that exceptions are being worked. When the total number of exceptions are worked, the tally disappears.
Depending on the cut-off time, an organization user can go back and change their decision to pay or return check exceptions. All check exceptions from the same day can be worked up until the cut-off time.
When all exceptions for an account are worked and submitted, a success toast displays at the bottom of the screen and the organization user automatically returns to the to the Positive pay dashboard.
Modify exceptions
An organization user can change their decision to pay or return check exceptions up until the cut-off time.
Cut-off time & locked items
An institution’s cut-off time is set on the host at the bank level. The time frame for working check exceptions displays to the organization user in the Work exceptions window (ex. Selections may be submitted 7:00 AM - 10:00 AM).
SilverLake
Silverlake institutions determine the cut-off time that organization users have for working check exceptions. The institution also predetermines whether exceptions are automatically paid or returned if they’re not worked by the cut-off time—if a decision is not made by the organization user, the institution’s default decision applies.
If it is past the financial institution’s cut-off time, each check exception displays as locked and cannot be worked. The message This exceptions item is currently locked also displays. When an item is locked, an organization user can view the exception but cannot work it. During end-of-day processing, the list of check exceptions and the dashboard list clears out.
Alerts
If items are uploaded to NetTeller, alerts to work exceptions are sent to organization users. For Banno Business Positive pay, alerts aren’t sent but the project is on the roadmap for feature functionality.
Activity events
- Banno People
- Users
- select user
- Activity
As an organization user engages with Positive pay, certain activity events generate in their user activity. Activity events can be filtered using Positive pay and include the following:
- Uploaded issued items
- Approved issued items
- Manually entered issued items
- Check exceptions
Error messages
When the organization user selects Approve to send the issued items to the core, the Banno app may appear to time out. Instead of a success message displaying, an alert notifies the organization user that the approval is in process. The organization user shouldn’t do any of the following:
- Re-upload the CSV file or manual entry
- Refresh the page
- Re-approve the checks
The submission is still processing, and the organization user can navigate to another section of the app. This includes uploading new files and checks from the Positive pay dashboard.
NetTeller
Institutions with Banno Business Positive pay and NetTeller have the option to continue using NetTeller—activity updates on both platforms.
Reports
Organization users can download Positive pay reports in NetTeller.
-
For additional information, refer to NetTeller documentation on ForClients. ↩︎