Treasury Management Mobile Experience - Business Bill Pay
Overview
TM Mobile Experience Business Bill Pay allows enrolled users in iPay Business Bill Pay to create payments, view payees, stop payments/series, view scheduled transactions and payment history.
Configuration
Back Office Configuration
To configure Business Bill Pay select the Configure Link for Bill Pay within Product Feature Configuration. A dialog will be presented with required fields and a toggle to allow iPay Business Bill Pay.
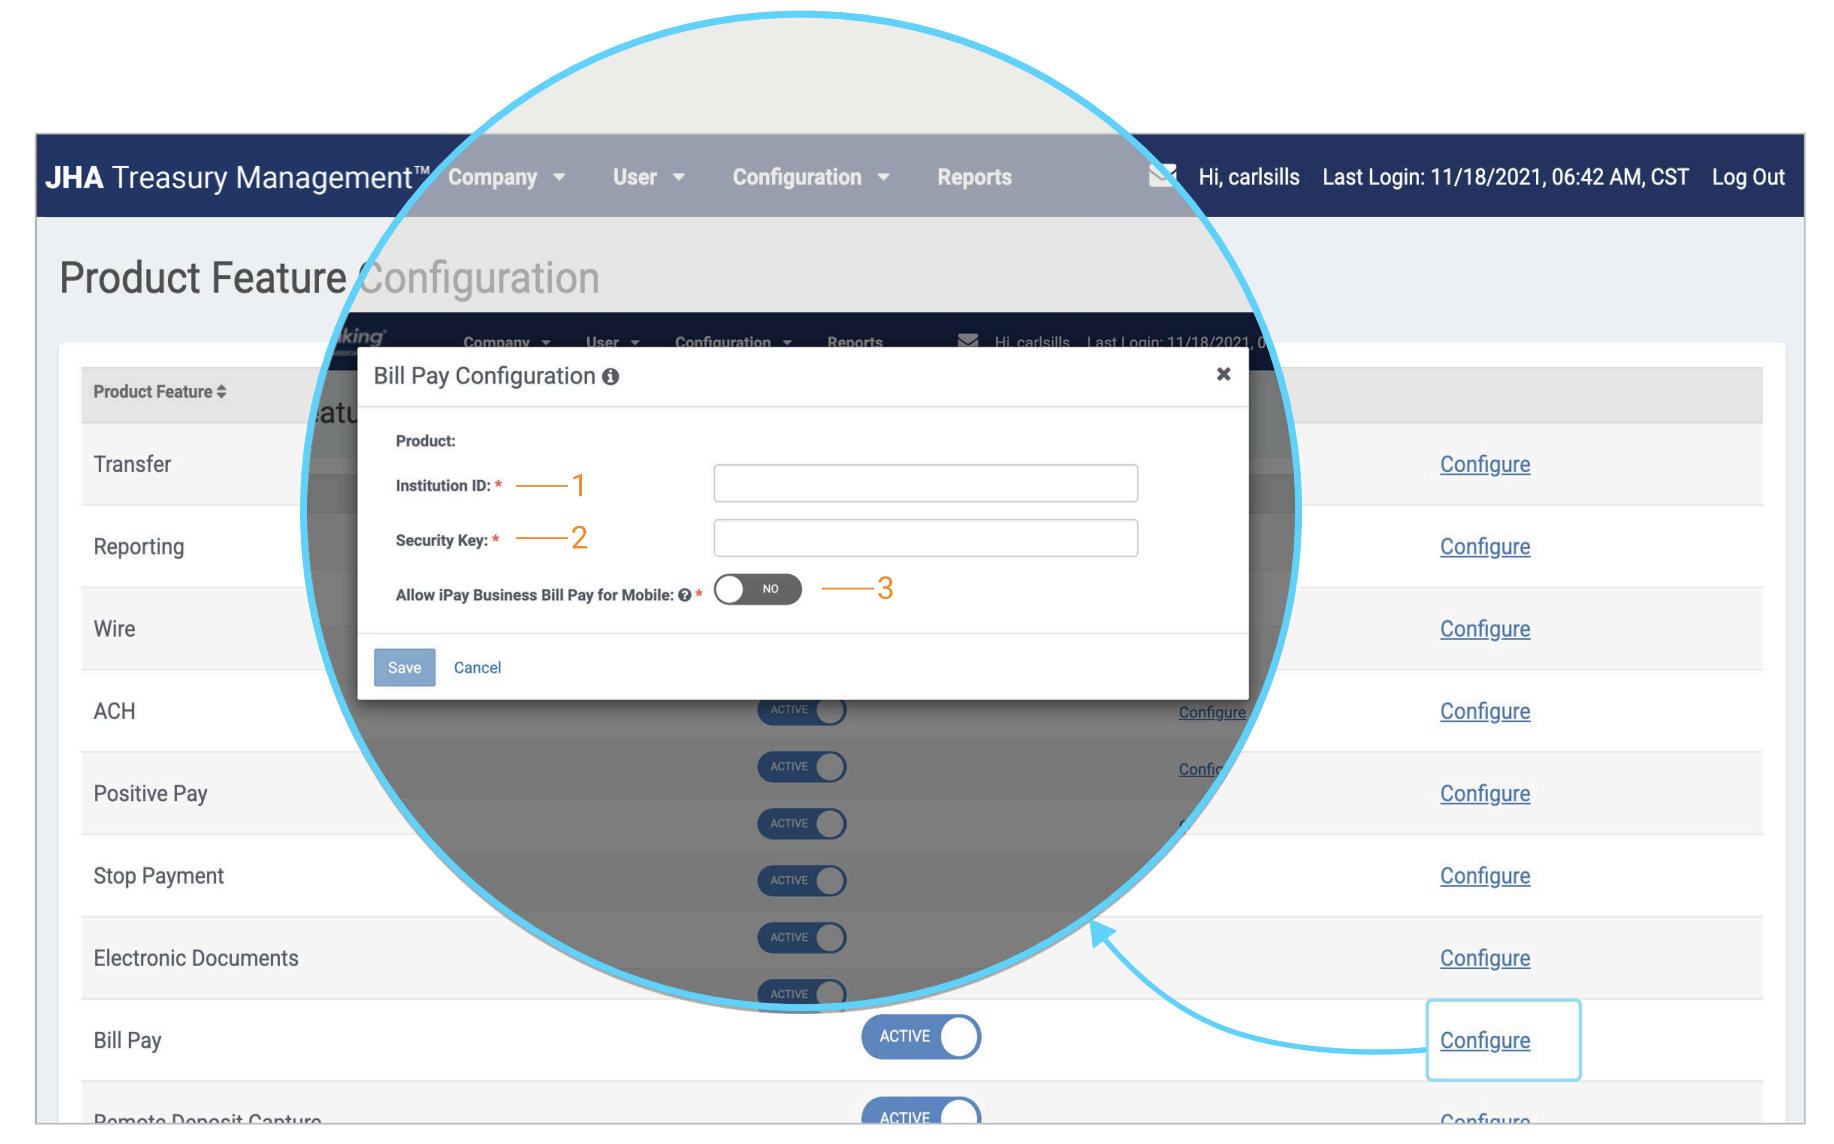
1. iPay Institution ID: Your iPay institution ID is required here to configure Business Bill Pay.
2. Security Key: A security key containing alpha, numeric, and special characters is generated by iPAY. When entered, it allows iPay to facilitate the single sign-on.
3. Allow iPay Business Bill Pay for Mobile: If set to Yes, entitled bill pay users will be able to access business bill pay through the JHA Treasury Management™ mobile app.
Business Bill Pay
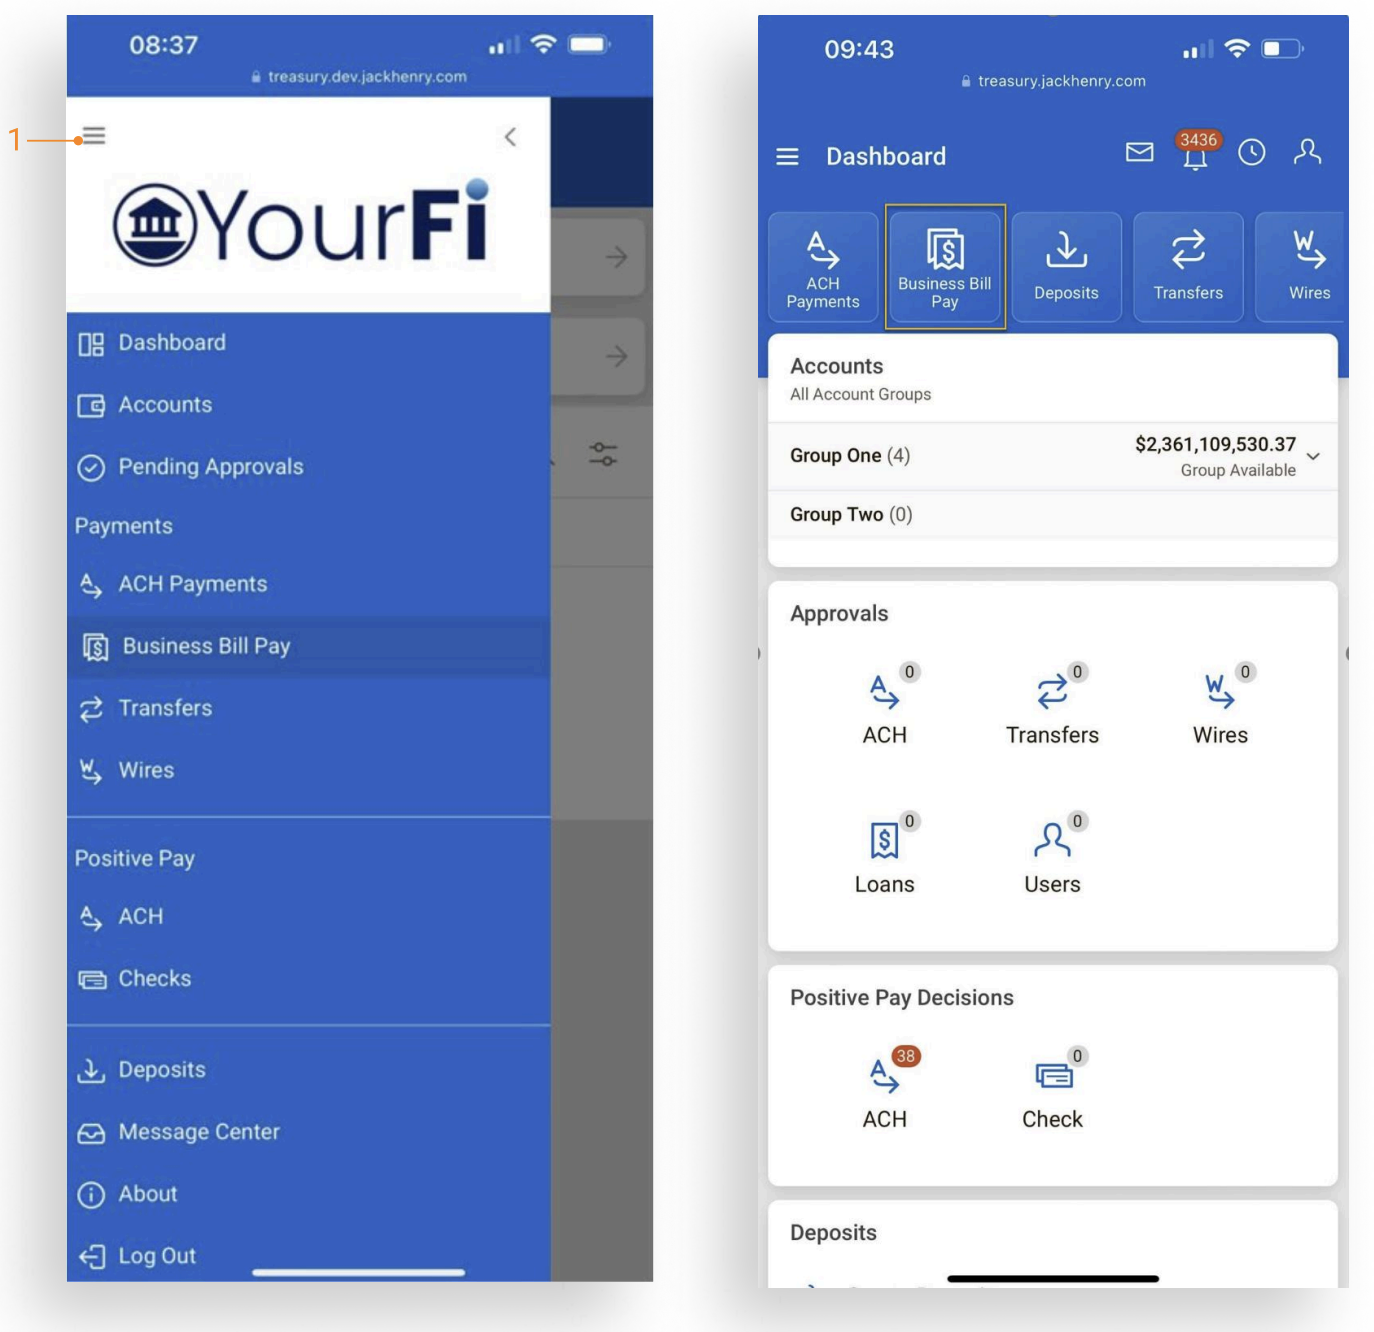
- Navigate to Business Bill Pay from the fly-out menu or Dashboard tile.
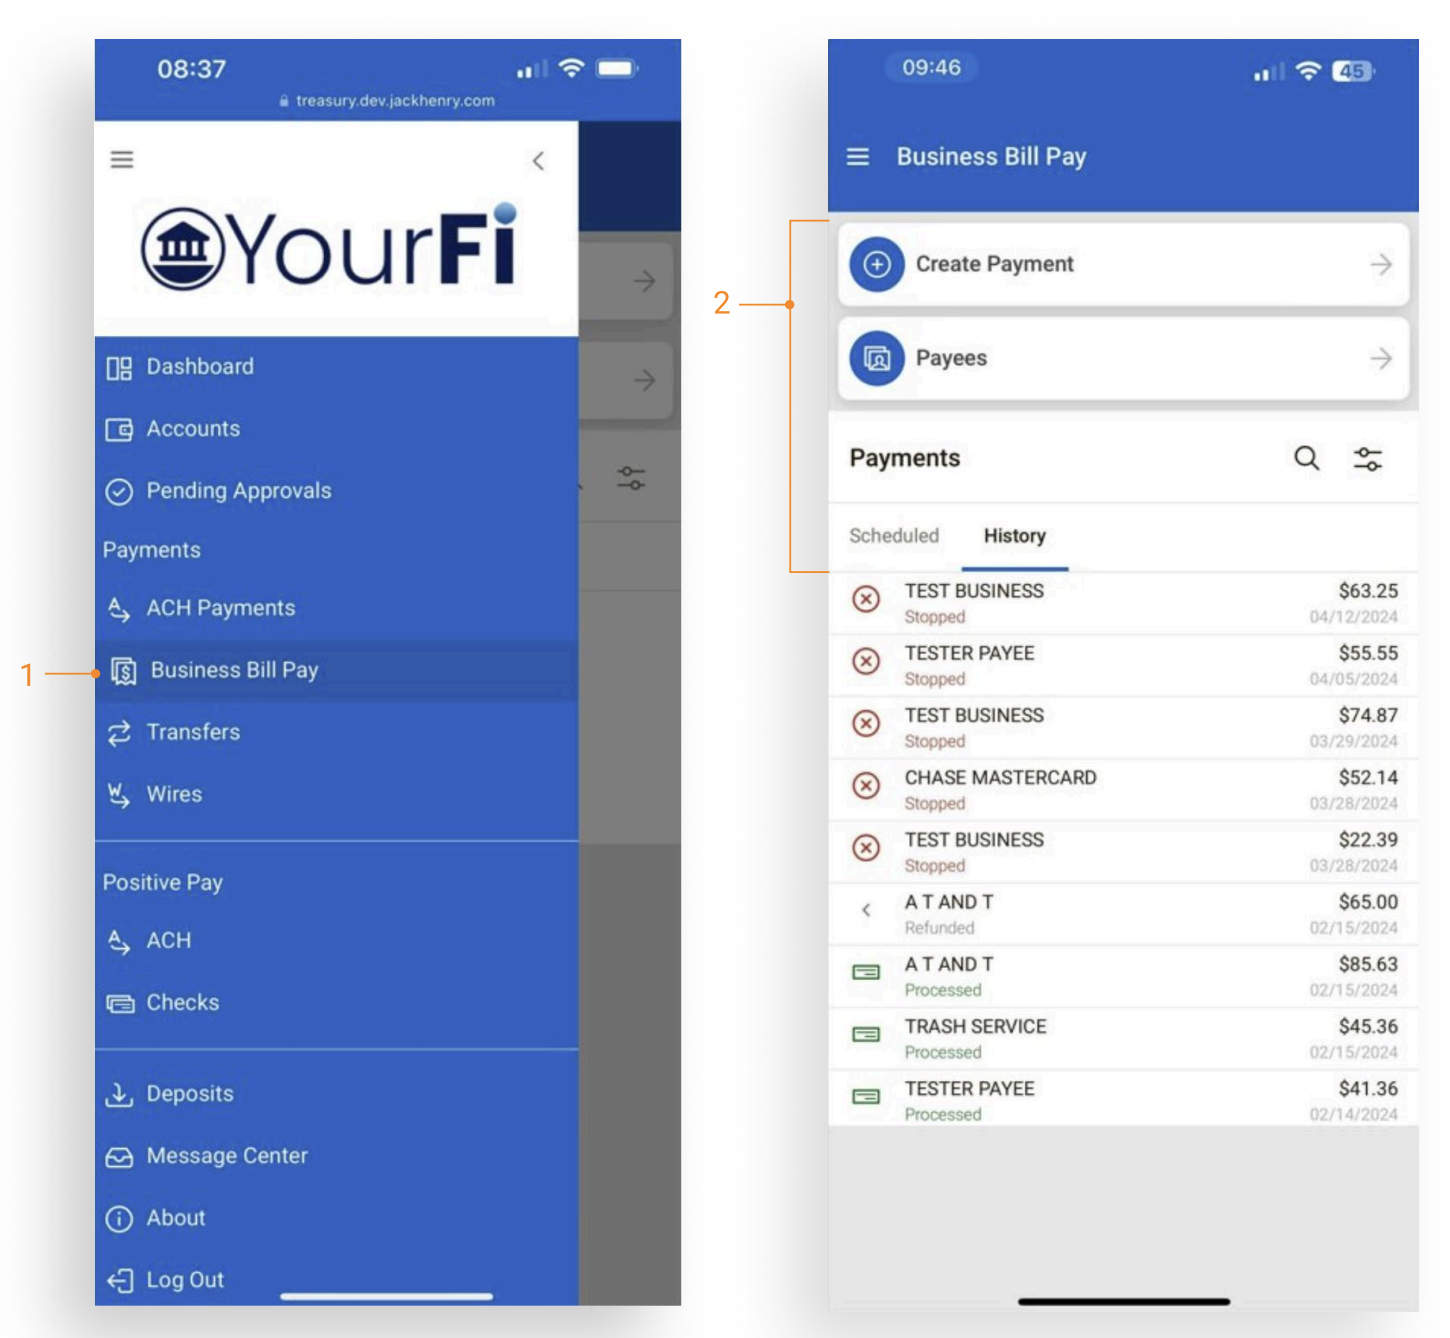
- Select Business Bill Pay from the fly-out menu or the Dashboard tile.
- Based on user entitlements, the following options display:
- Create Payment
- Payees
- Scheduled Payments
- Payment History
Business Bill Pay - Create Payment
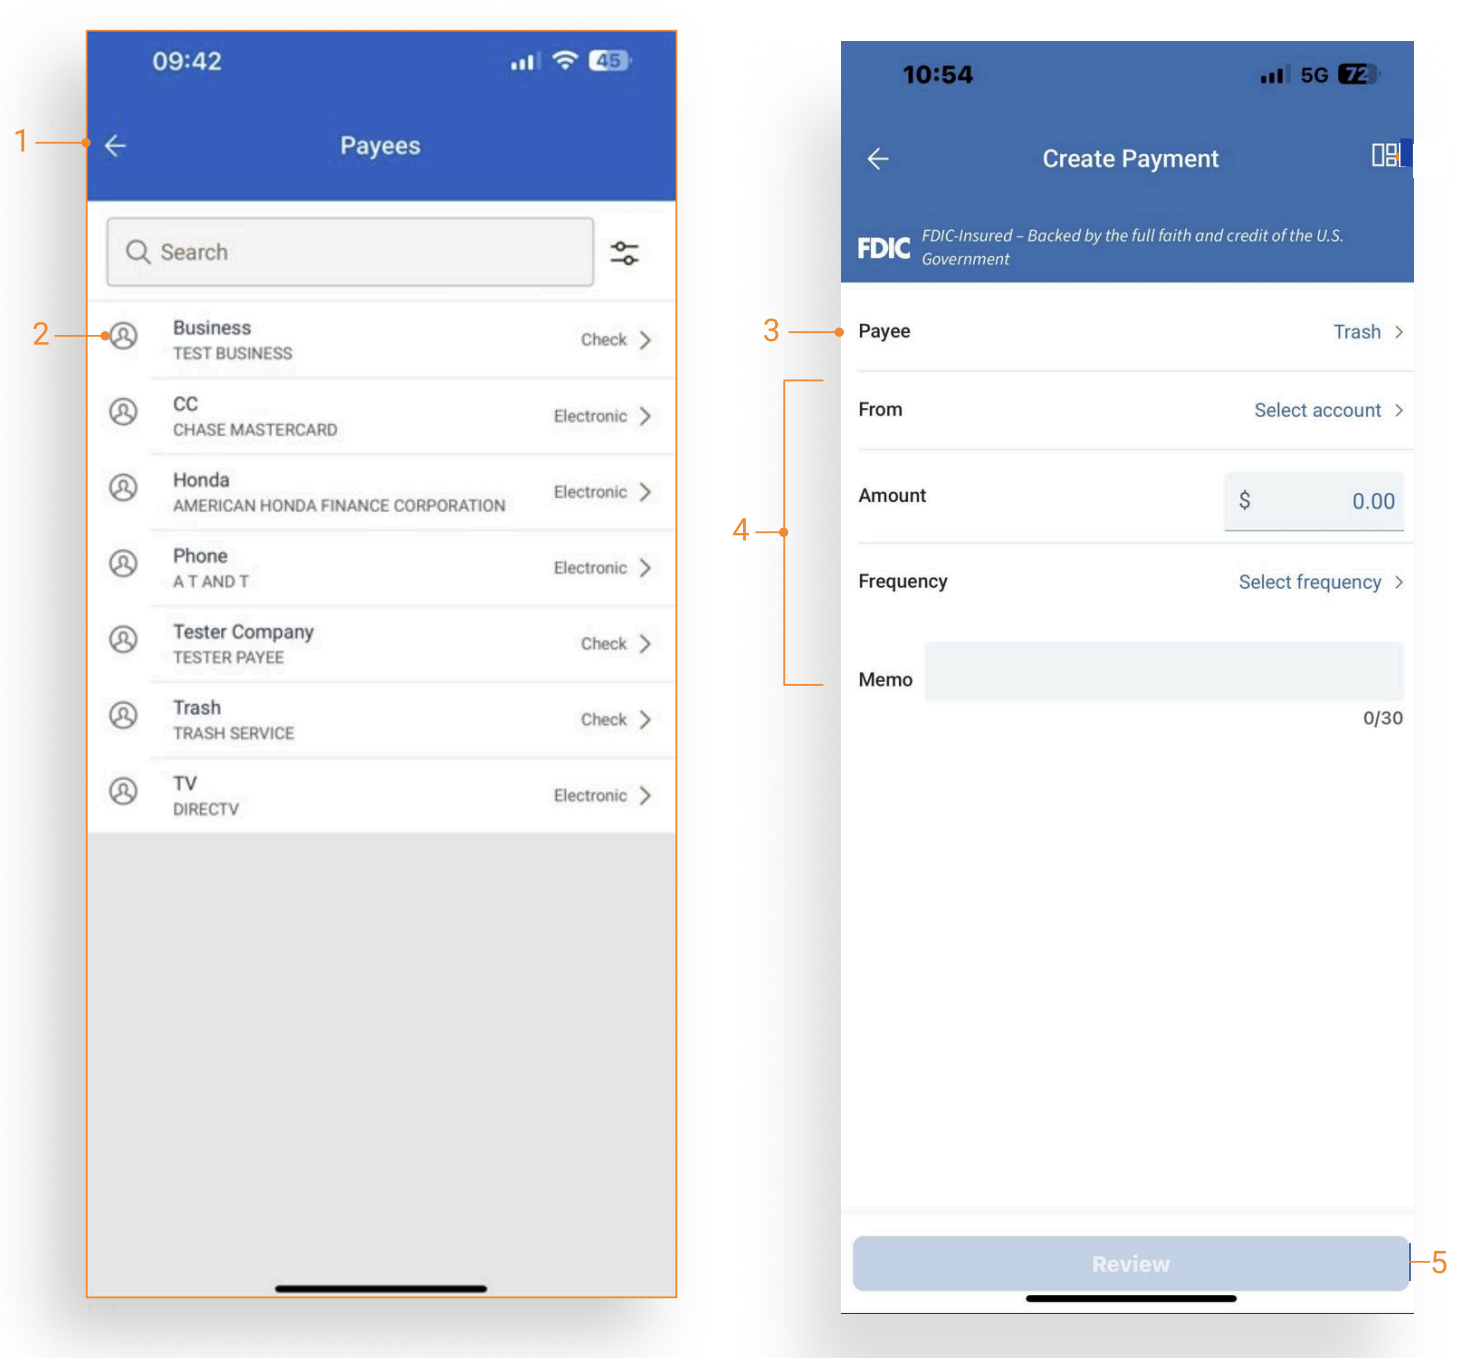
- Select Create Payment to navigate to the Select Payee page.
- Select a Payee to advance to the Create Payment screen.
- The selected Payee will pre-populate.
- Complete the From, Amount, and Frequency fields. Including a Memo is optional.
- From: Select the account from which the funds are being transferred.
- Amount: Enter the amount to be transferred.
- Frequency: Use the toggle to initiate a recurring payment or leave unselected for a one-time payment. Select the payment frequency from the drop-down menu for a recurring payment or a date on the calendar for a one-time payment.
- Tap Review to verify payment information.
- If the information entered is correct, tap Initiate Payment to submit and complete the payment.
Business Bill Pay - Payees
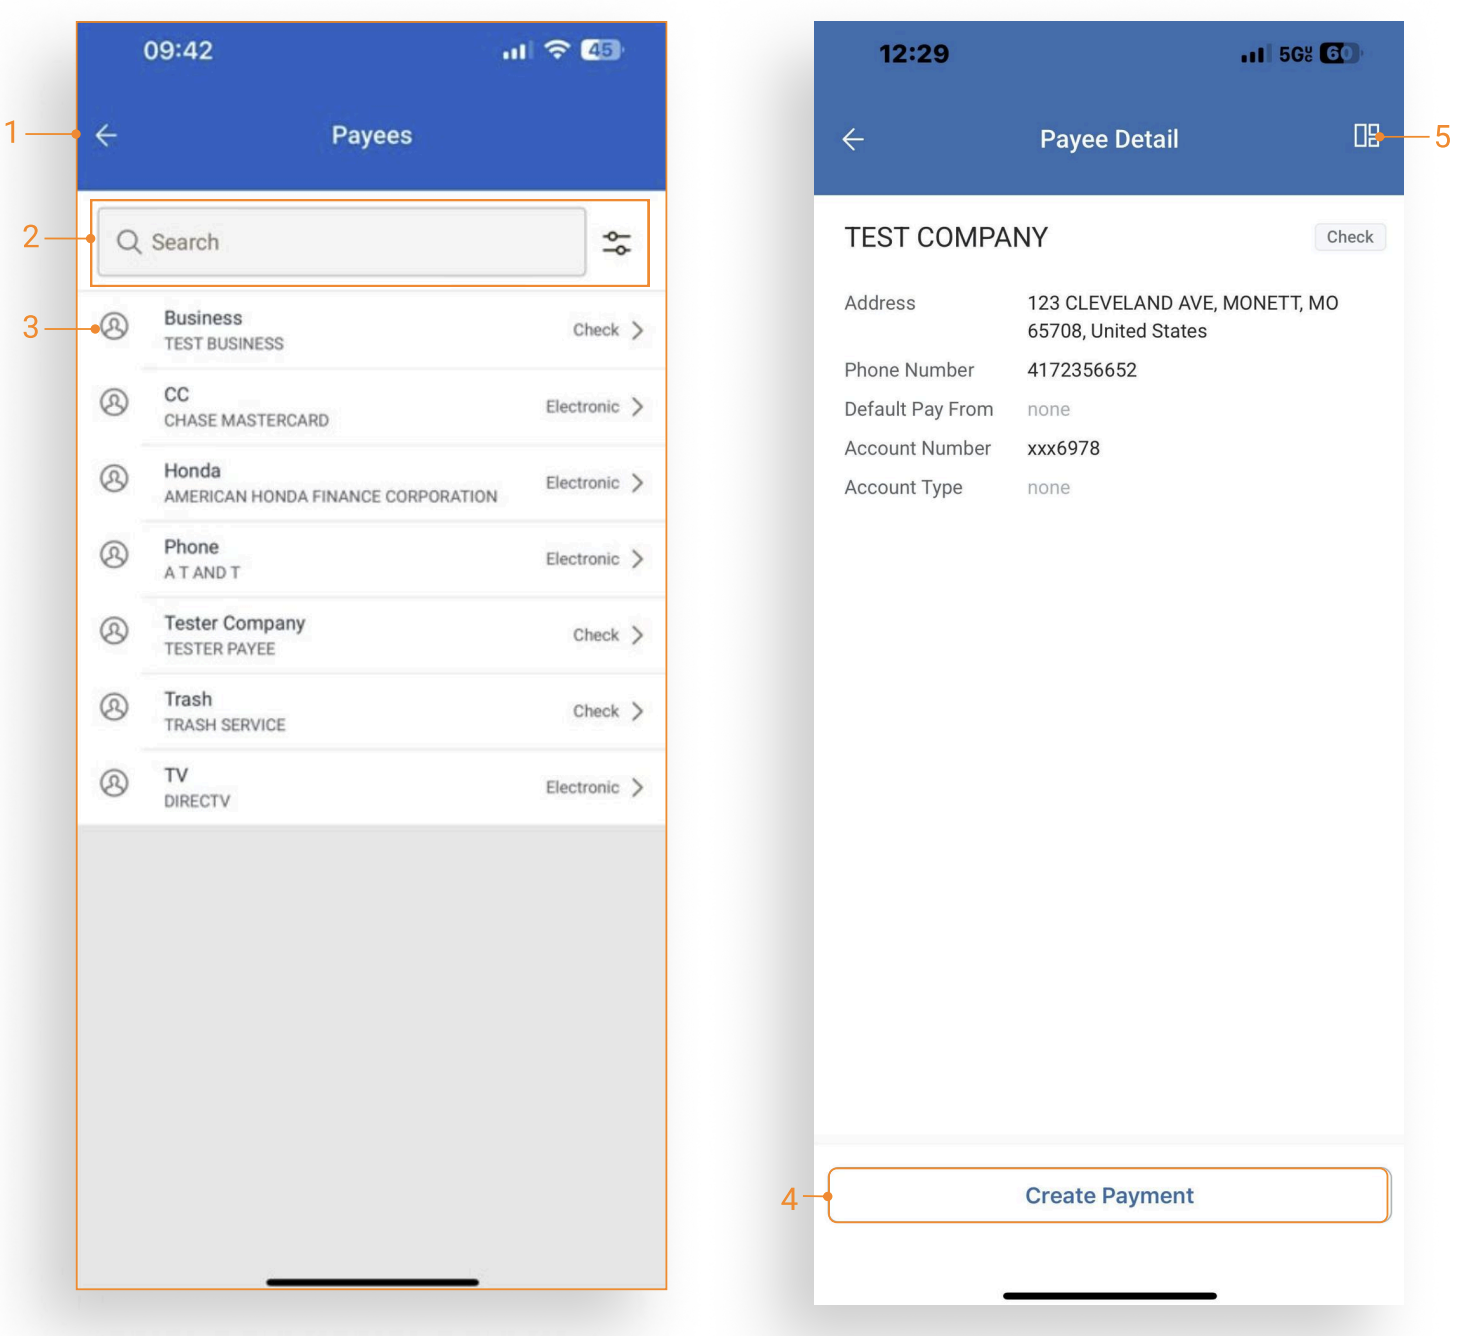
- Select Payees on the Business Bill Pay home screen.
- Use the Search field or Advanced filter to narrow search results.
- Tap a payee to view the full payee detail.
- Click Create Payment to initiate a payment from the Payee Detail screen.
- Quick navigation back to dashboard.
Business Bill Pay - Scheduled Payments
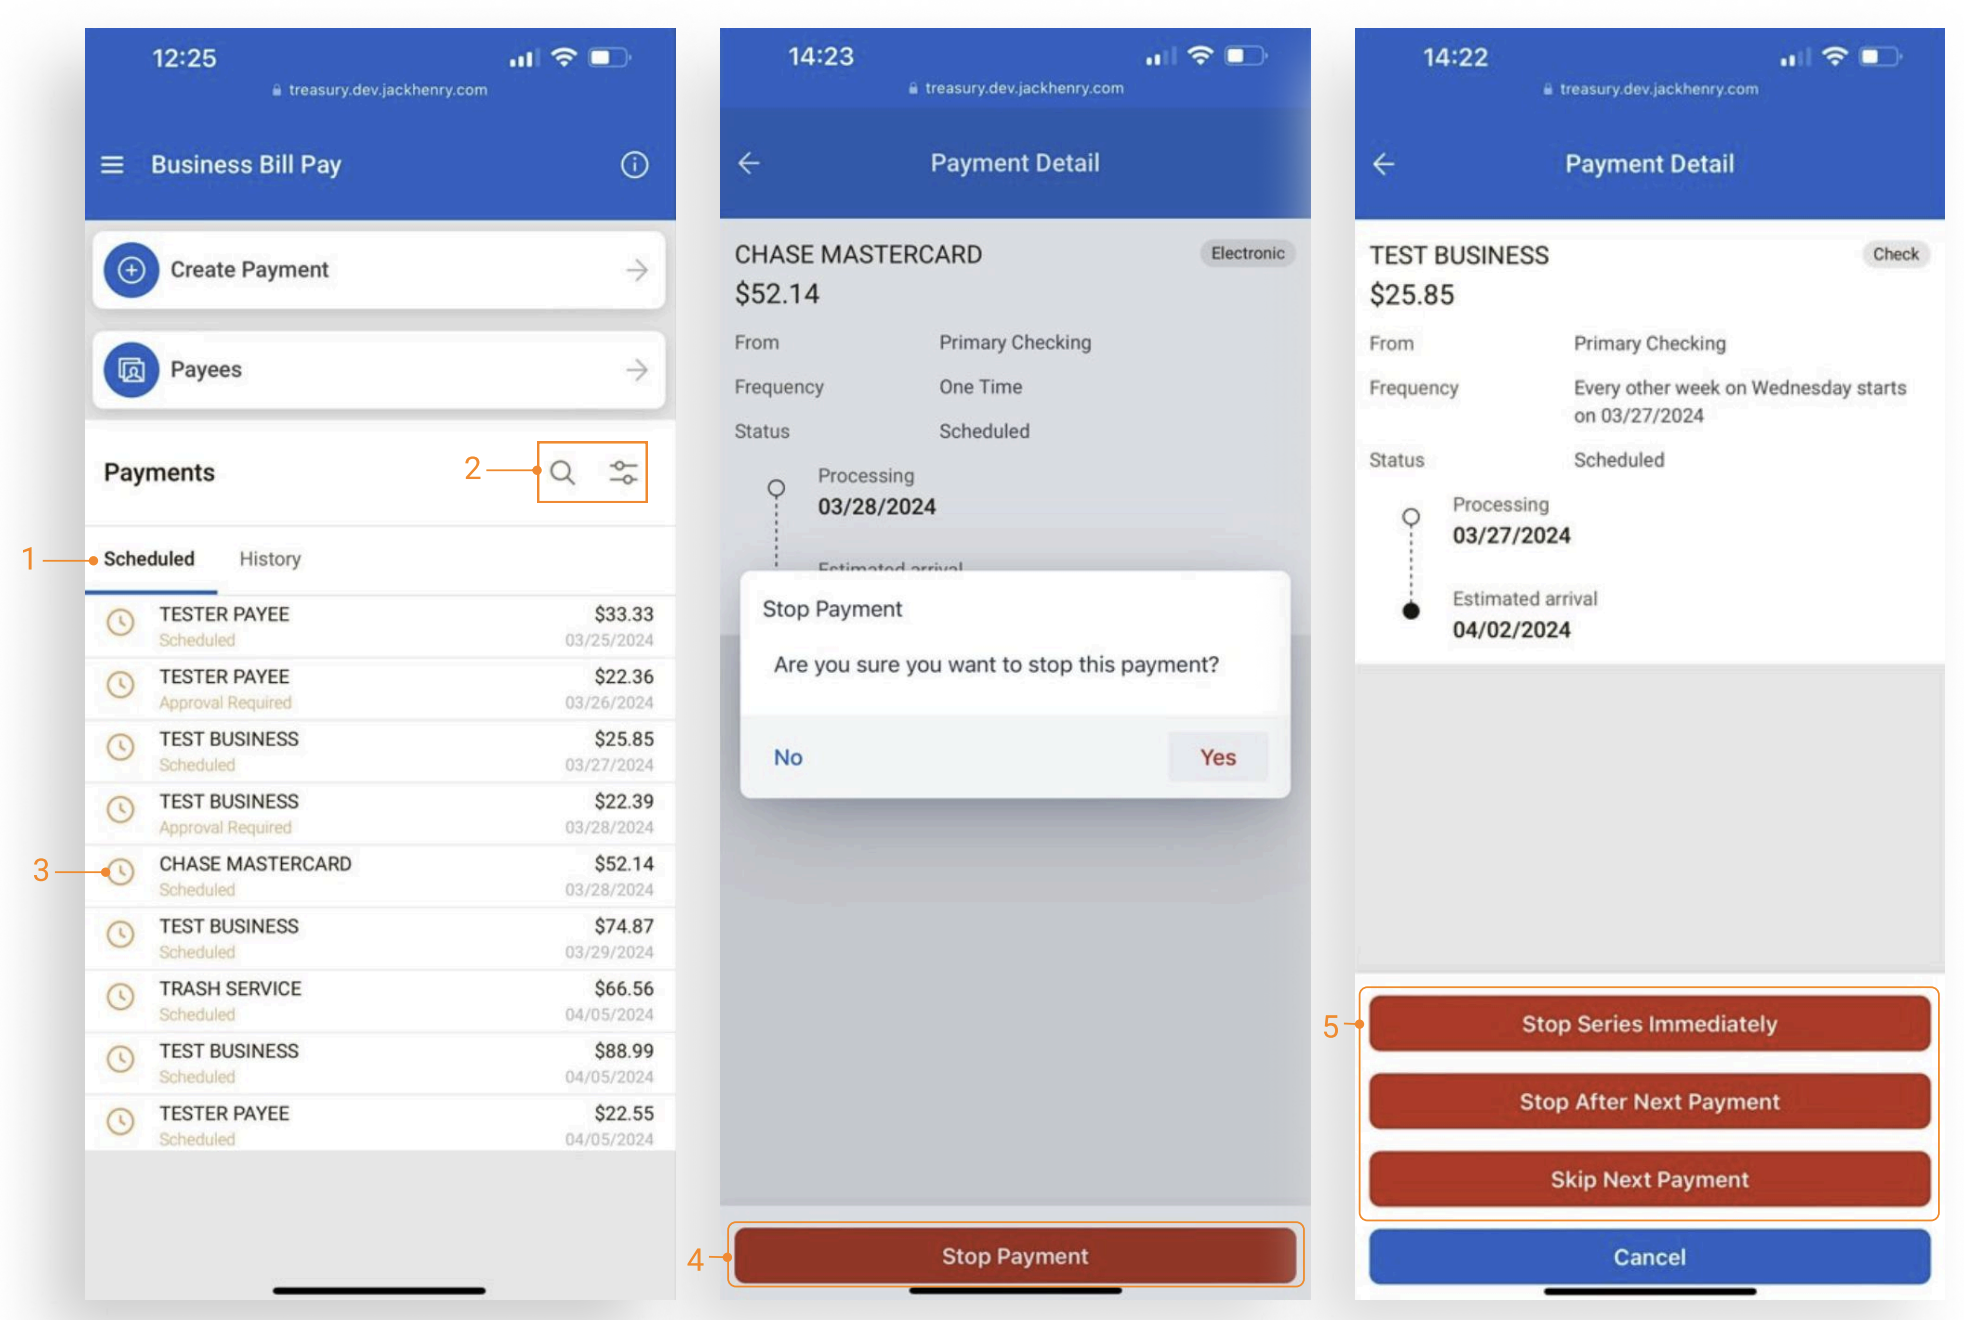
- Scheduled Payments is the default view on the Business Bill Pay home screen.
- Use Search or the Advanced filter to narrow search results.
- Tap a scheduled payment to view full payment details.
- Use the Stop Payment button to stop a payment.
- Stop payment options available for scheduled and recurring payments:
- Stop Series Immediately
- Stop After Next Payment
- Skip Next Payment
Business Bill Pay - Payment History
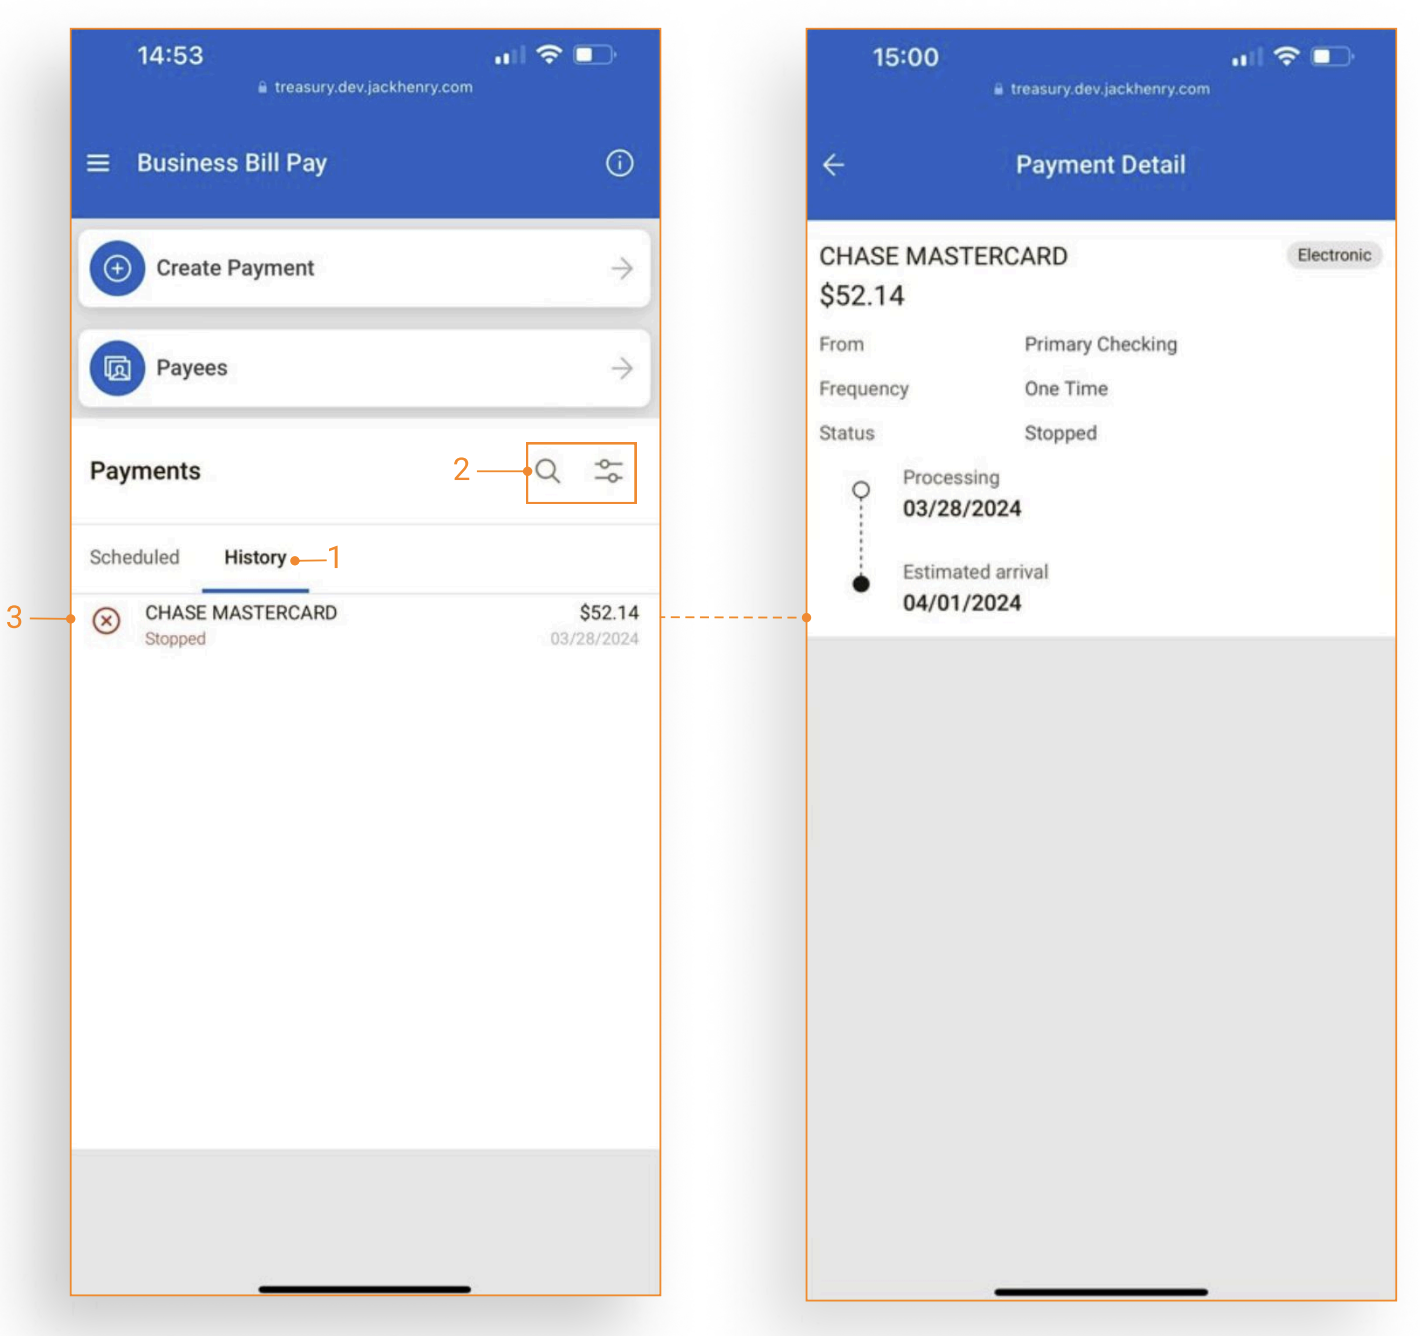
- Tap the history tab under Payments to view the payment history.
- Use Search or the Advanced filter to narrow search results.
- Tap a payment activity to view full payment details.