Onboarding with Enterprise Workflow
What is it?
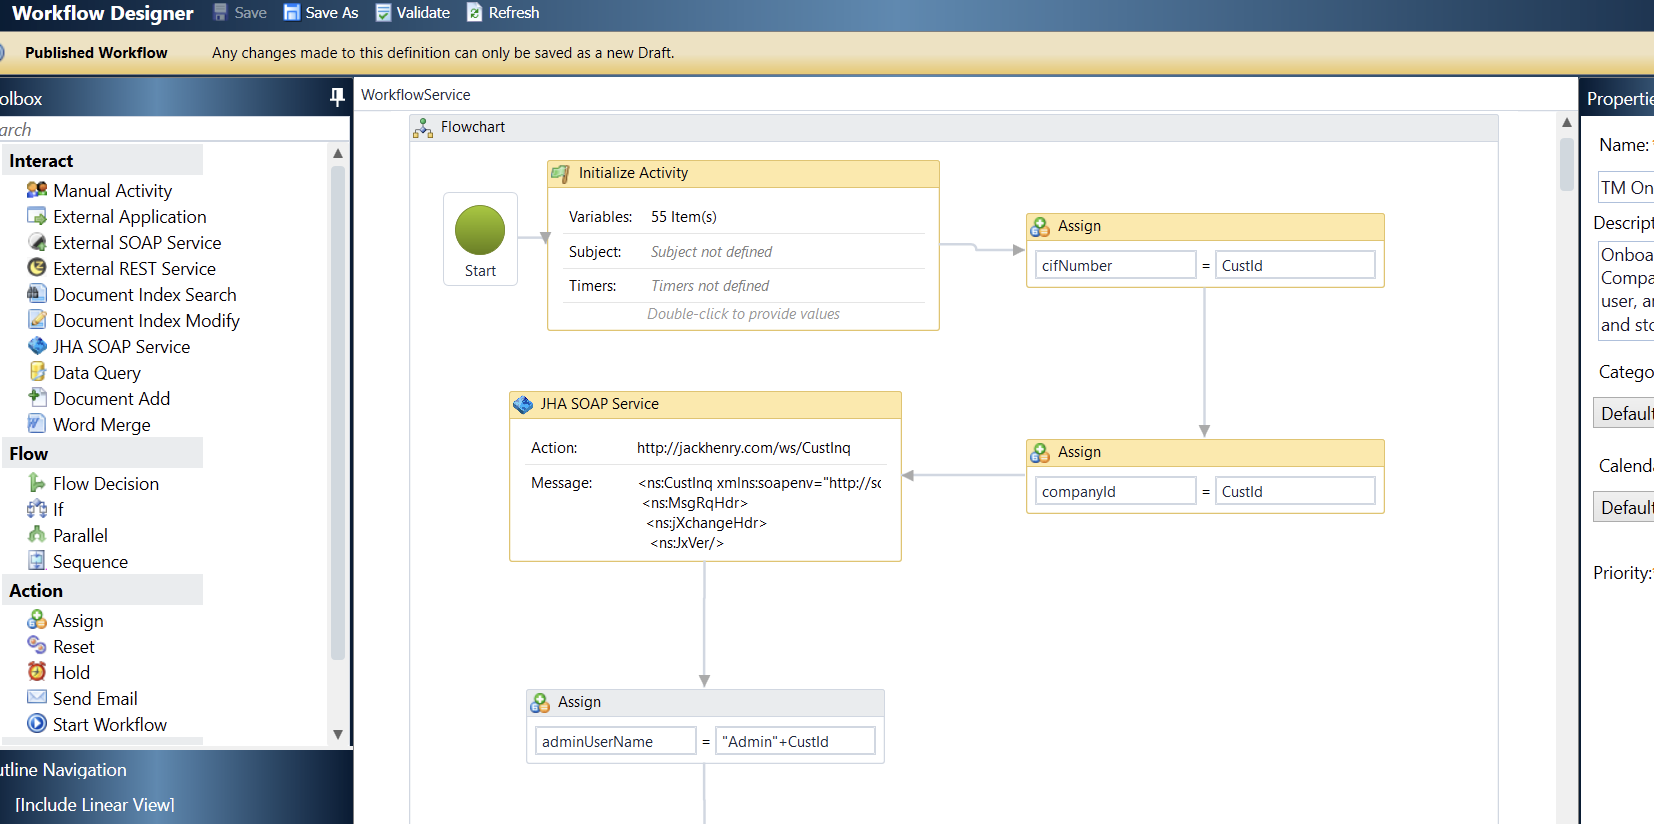
Using Jack Henry Enterprise Workflow, financial institutions may now onboard a Banno Business organization and administrative user, eliminating the need to take action within NetTeller. This workflow will:
- Create a NetTeller ID for the CIF, creating the organization within Banno Business automatically.
- This will create the ID with defaults set in NETPAR Option 1.
- Create a Cash Management user ID for the organization’s initial administrator.
- This will create a user with entitlements set within the workflow that can be customized to allow for the permissions that users would like to have set for each administrator. Learn more in the Permissions section below.
- By default, this will give the Admin User access to all accounts associated to the newly created NetTeller ID.
Permissions
Permissions for the organization’s NTID (Banno org) are derived from NETPAR option 1. In contrast, CM user permissions are determined by the values specified directly within the workflow. CM user account permissions default to “N”, with the sole exception being Positive Pay permissions, which are set to the value defined in the workflow.
How to Install
Prerequisites
If a financial institution preparing to begin installation does not have the following, please open a support case.
- Must be Live on Banno Business and EWF (version 2023)
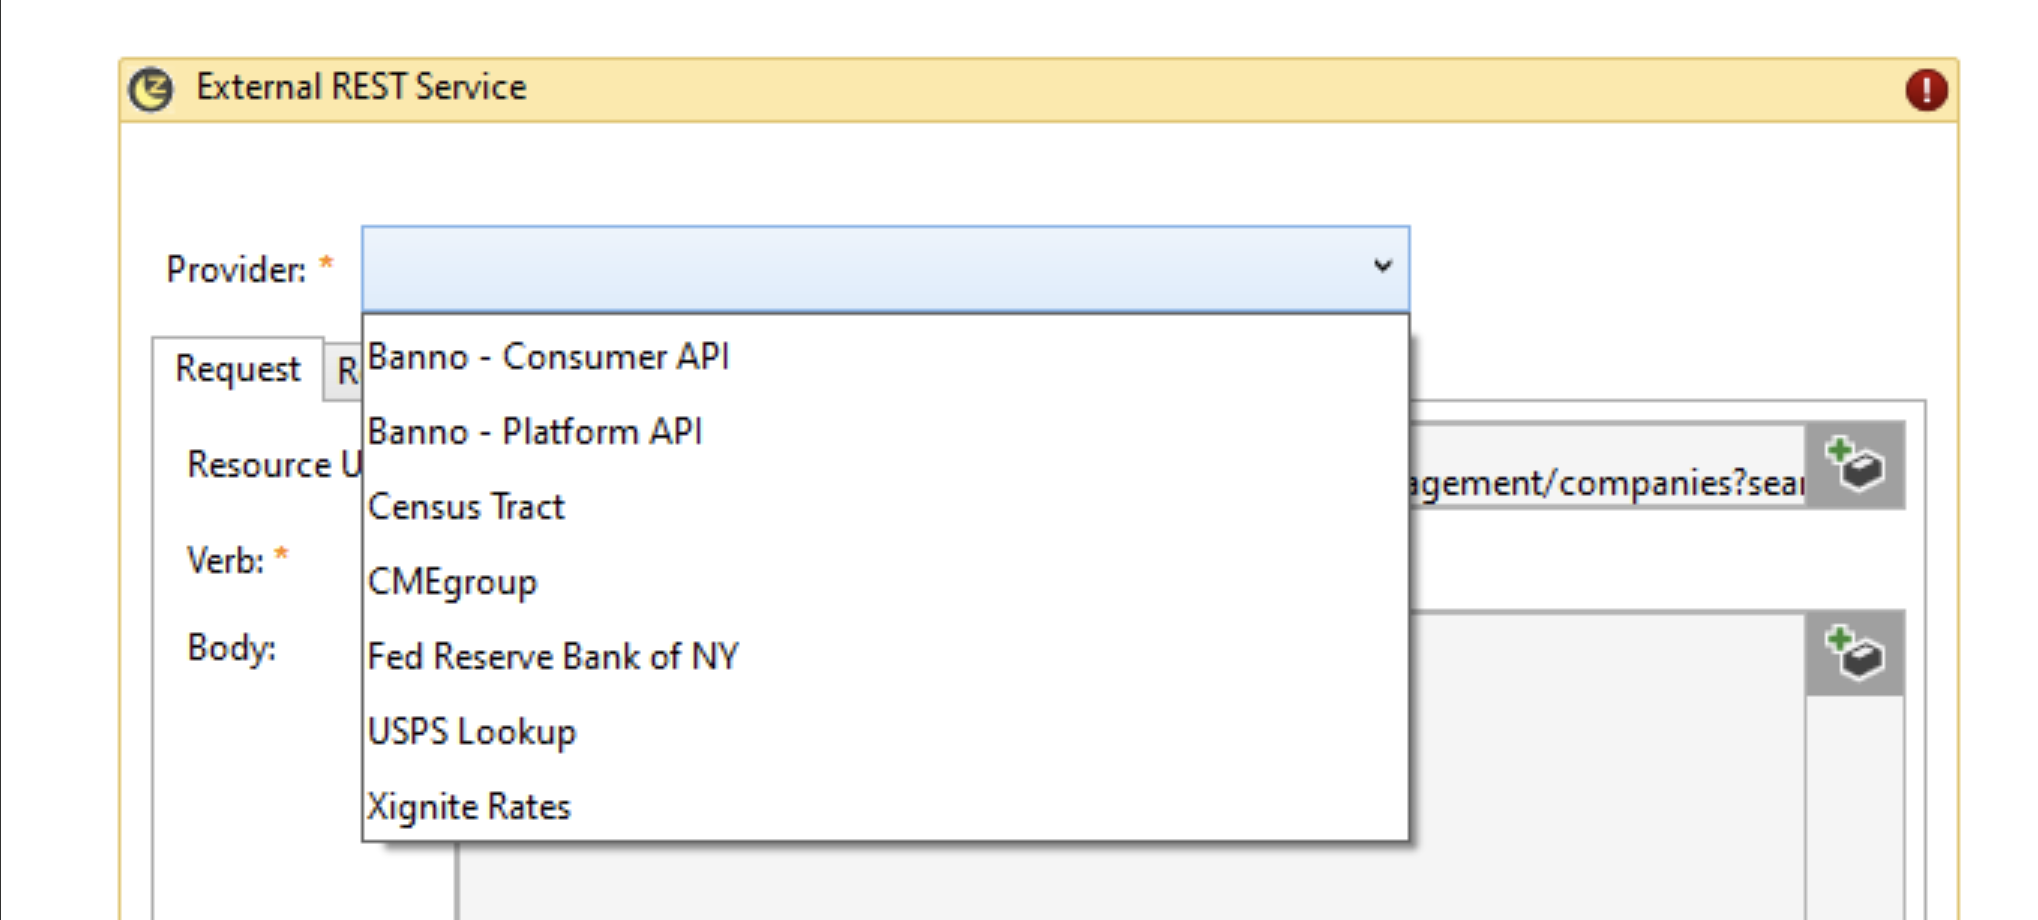
- Must have the Banno – Platform API Provider within Enterprise Workflow (This is what is used to authenticate Banno Business APIs within the workflow.)
- Optional, but highly recommended: Have the Start a Workflow button in SilverLake installed
Install Steps: New Installs
- To begin using the new workflow template, create a case with Banno Business Support Group requesting installation of the Banno Business Enterprise Workflow Integration.
- Then, visit the Jack Henry Marketplace and download the new Banno Business Workflow template. The Jack Henry Marketplace can be accessed here: https://marketplace.jackhenry.com/Home.aspx.
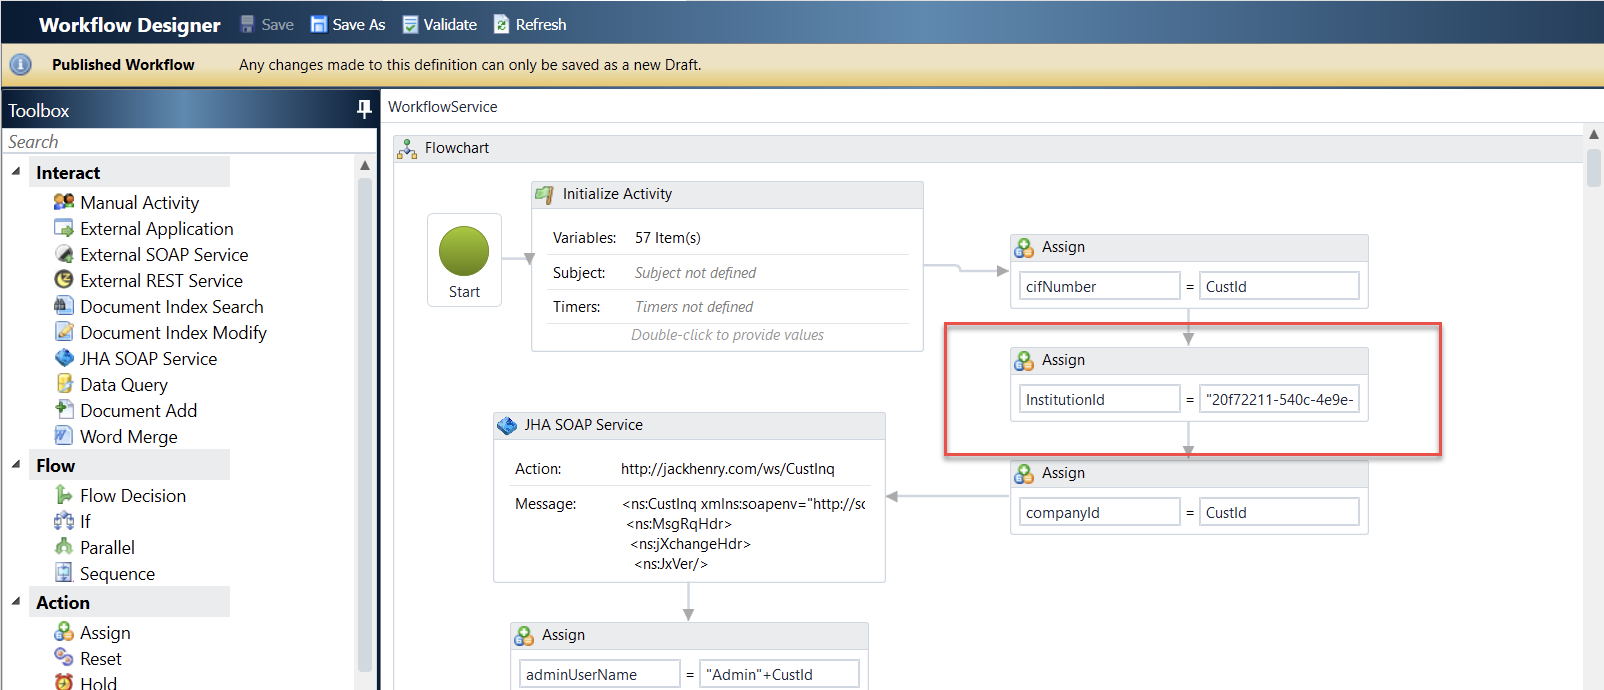
- When installation is complete, users will be provided with an “Institution ID”. This will need to be added to the “Institution ID” Assign field in the Workflow Definition.
- In each API call, click Provider and select Banno – Platform API.
- Within Workflow Administration, add bank group/employee permissions as to who can view and run the workflow.
- Ensure defaults set in NETPAR Option 1 and Option 2 are accurate.
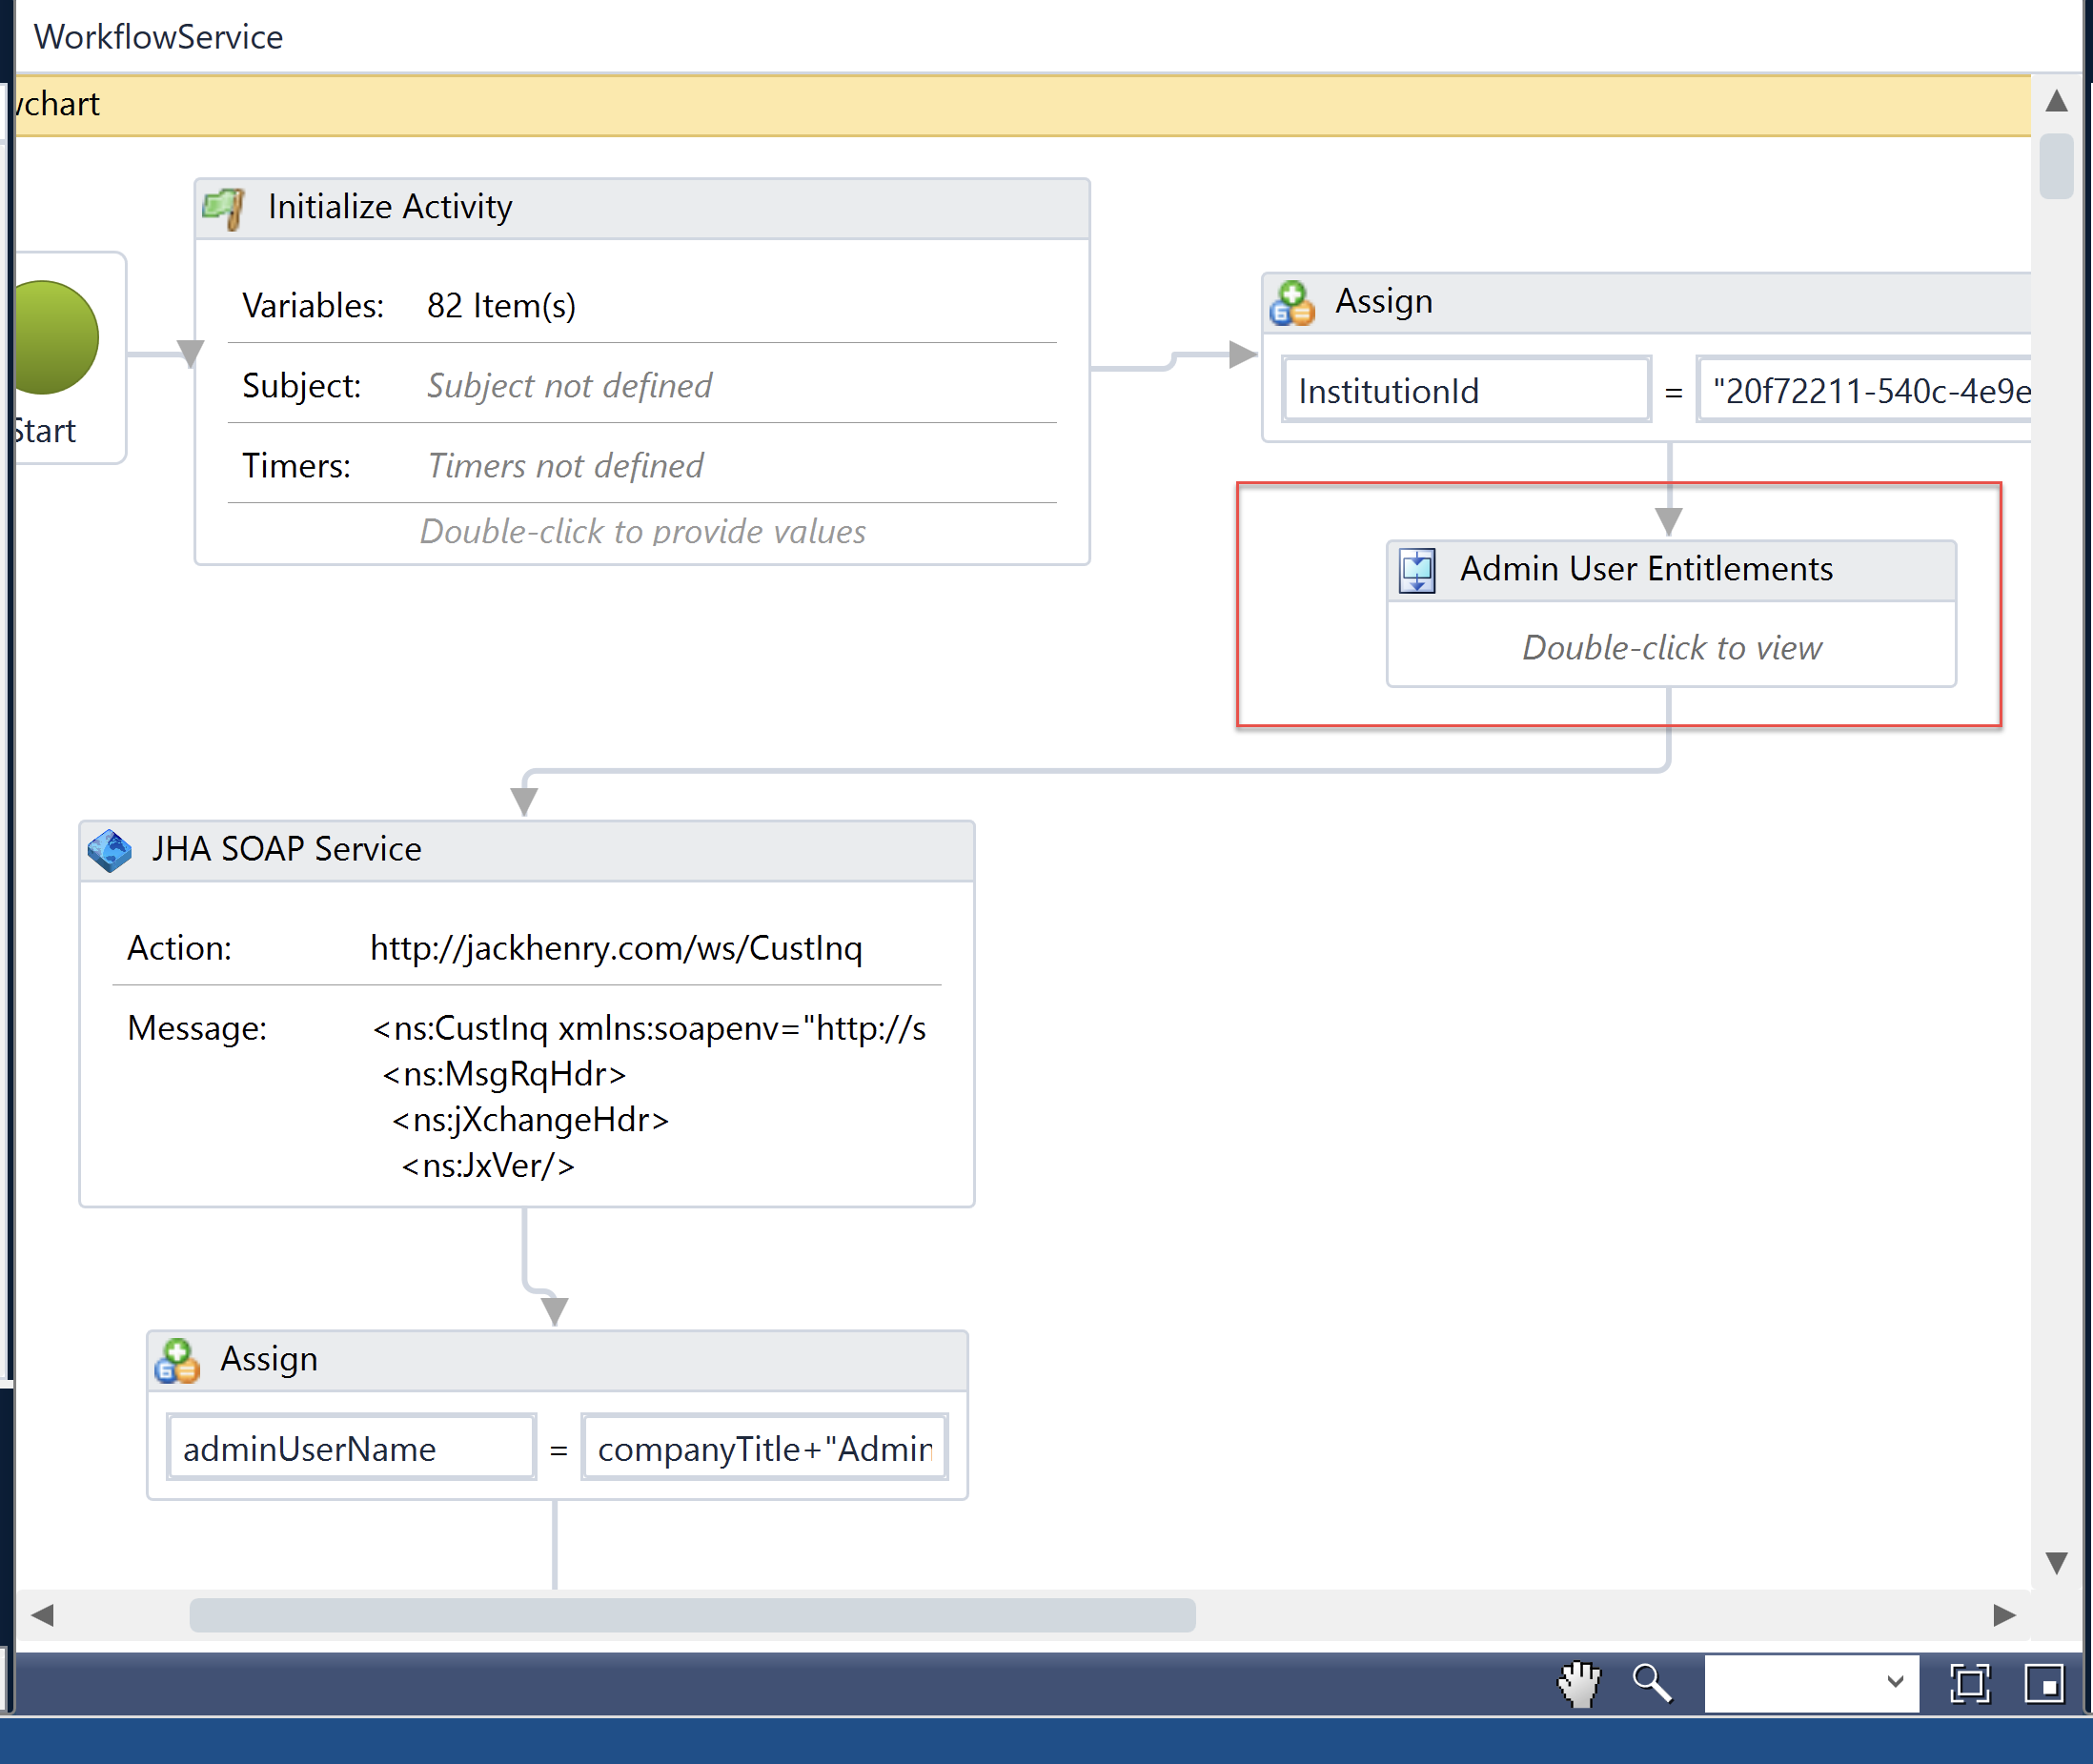
- Ensure the Admin User Entitlements within the workflow are accurate.
- If enabling wires, ensure “Allow Create of Co Employee from NetTeller” is set to “Y” in WTPAR > General Parameter Maintenance.
How to Use
Fully Automated Template
In the fully automated template, the default administrator username will be set to CIF Name + Admin. The default administrator email will be set to the CIF email address.
- Create the new customer’s CIF in SilverLake.
- Add and associate all accounts with the CIF in SilverLake.
- If the organization will be sending wires, ensure the wire company is set up in SilverLake.
- Go to the CIF Screen in SilverLake. Go to Related Functions > Start a Workflow.
- Select the workflow template that will be started.
- Click Ok.
Default Information: Fully Automated Template
Manual Input Template
In the manual input template, the default administrator username will be the name entered + Admin. The default administrator email will be set to the email address that was entered.
- Create the new customer’s CIF in SilverLake.
- Add and associate all accounts with the CIF in SilverLake.
- If the organization will be sending wires, ensure that the wire company is setup in SilverLake.
- Go to the CIF Screen in SilverLake. Go to Related Functions > Start a Workflow.
- Select the workflow template you would like to start.
- Click Ok.
- Go to the Workflow Queue. Upon initiation of the workflow, a manual input box should appear.
- Populate the values within the workflow activity.
- Select Complete.

How to Customize
How to Remove Workflow Steps
The steps below can also be used to add parts of the workflow to other new or existing workflows. Simply “cut” or “copy” steps and “paste” to the new/existing workflow (rather than “delete”).
- Admin User
- Delete the External Rest Service titled: REST - Create Admin User
- Delete the External Rest Service titled: REST – Add accounts for the admin user
- Also, delete the Decision “Response Code = 200”, the False response beneath this step, and the Assign “Response Code = 0”
- Delete all steps between steps a and b above
- Carry the “True” arrow from the last Assign for “Response Code = 0” to the Manual Activity for “Workflow Complete
- Administrator Entitlements
- Delete the External Rest Service titled: REST – Add Entitlements for Admin User
- Also, delete the Decision “Response Code = 200”, the False response, and the Assign “Response Code=0” beneath this step
- Carry the “True” arrow from the last Assign for “Response Code = 0” to the External Rest Service titled: REST – Add accounts for the admin user
- Delete the External Rest Service titled: REST – Add Entitlements for Admin User
- Add Accounts to Admin User
- Delete the External Rest Service titled: REST – Add accounts for the admin user
- Also, delete the Decision “Response Code = 200”, the False response, and the Assign “Response Code=0” beneath this step
- Carry the “True” arrow from the last Assign for “Response Code = 0” to the Manual Activity for “Workflow Complete”
- Delete the External Rest Service titled: REST – Add accounts for the admin user
How to Modify Admin User Entitlements: Workflow Variables
Within the Sequence for “Admin User Entitlements” towards the top of the workflow, there are multiple variables that can be changed. Below are values to which they can be changed.
Note: Unless otherwise specified, all variable values should be set to “Y” or “N”. Values must be capitalized.
Additionally, workflow variable maps denoted by Not used means the variable controls something in Core or NTBO, but that that setting is not honored in Banno Business; it may still be honored by NTCM. Workflow variable maps denoted by N/A means the platform in question (Banno, NTBO, Core) does not have an equivalent permission but that the permission may still control functionality in Banno or NTCM.
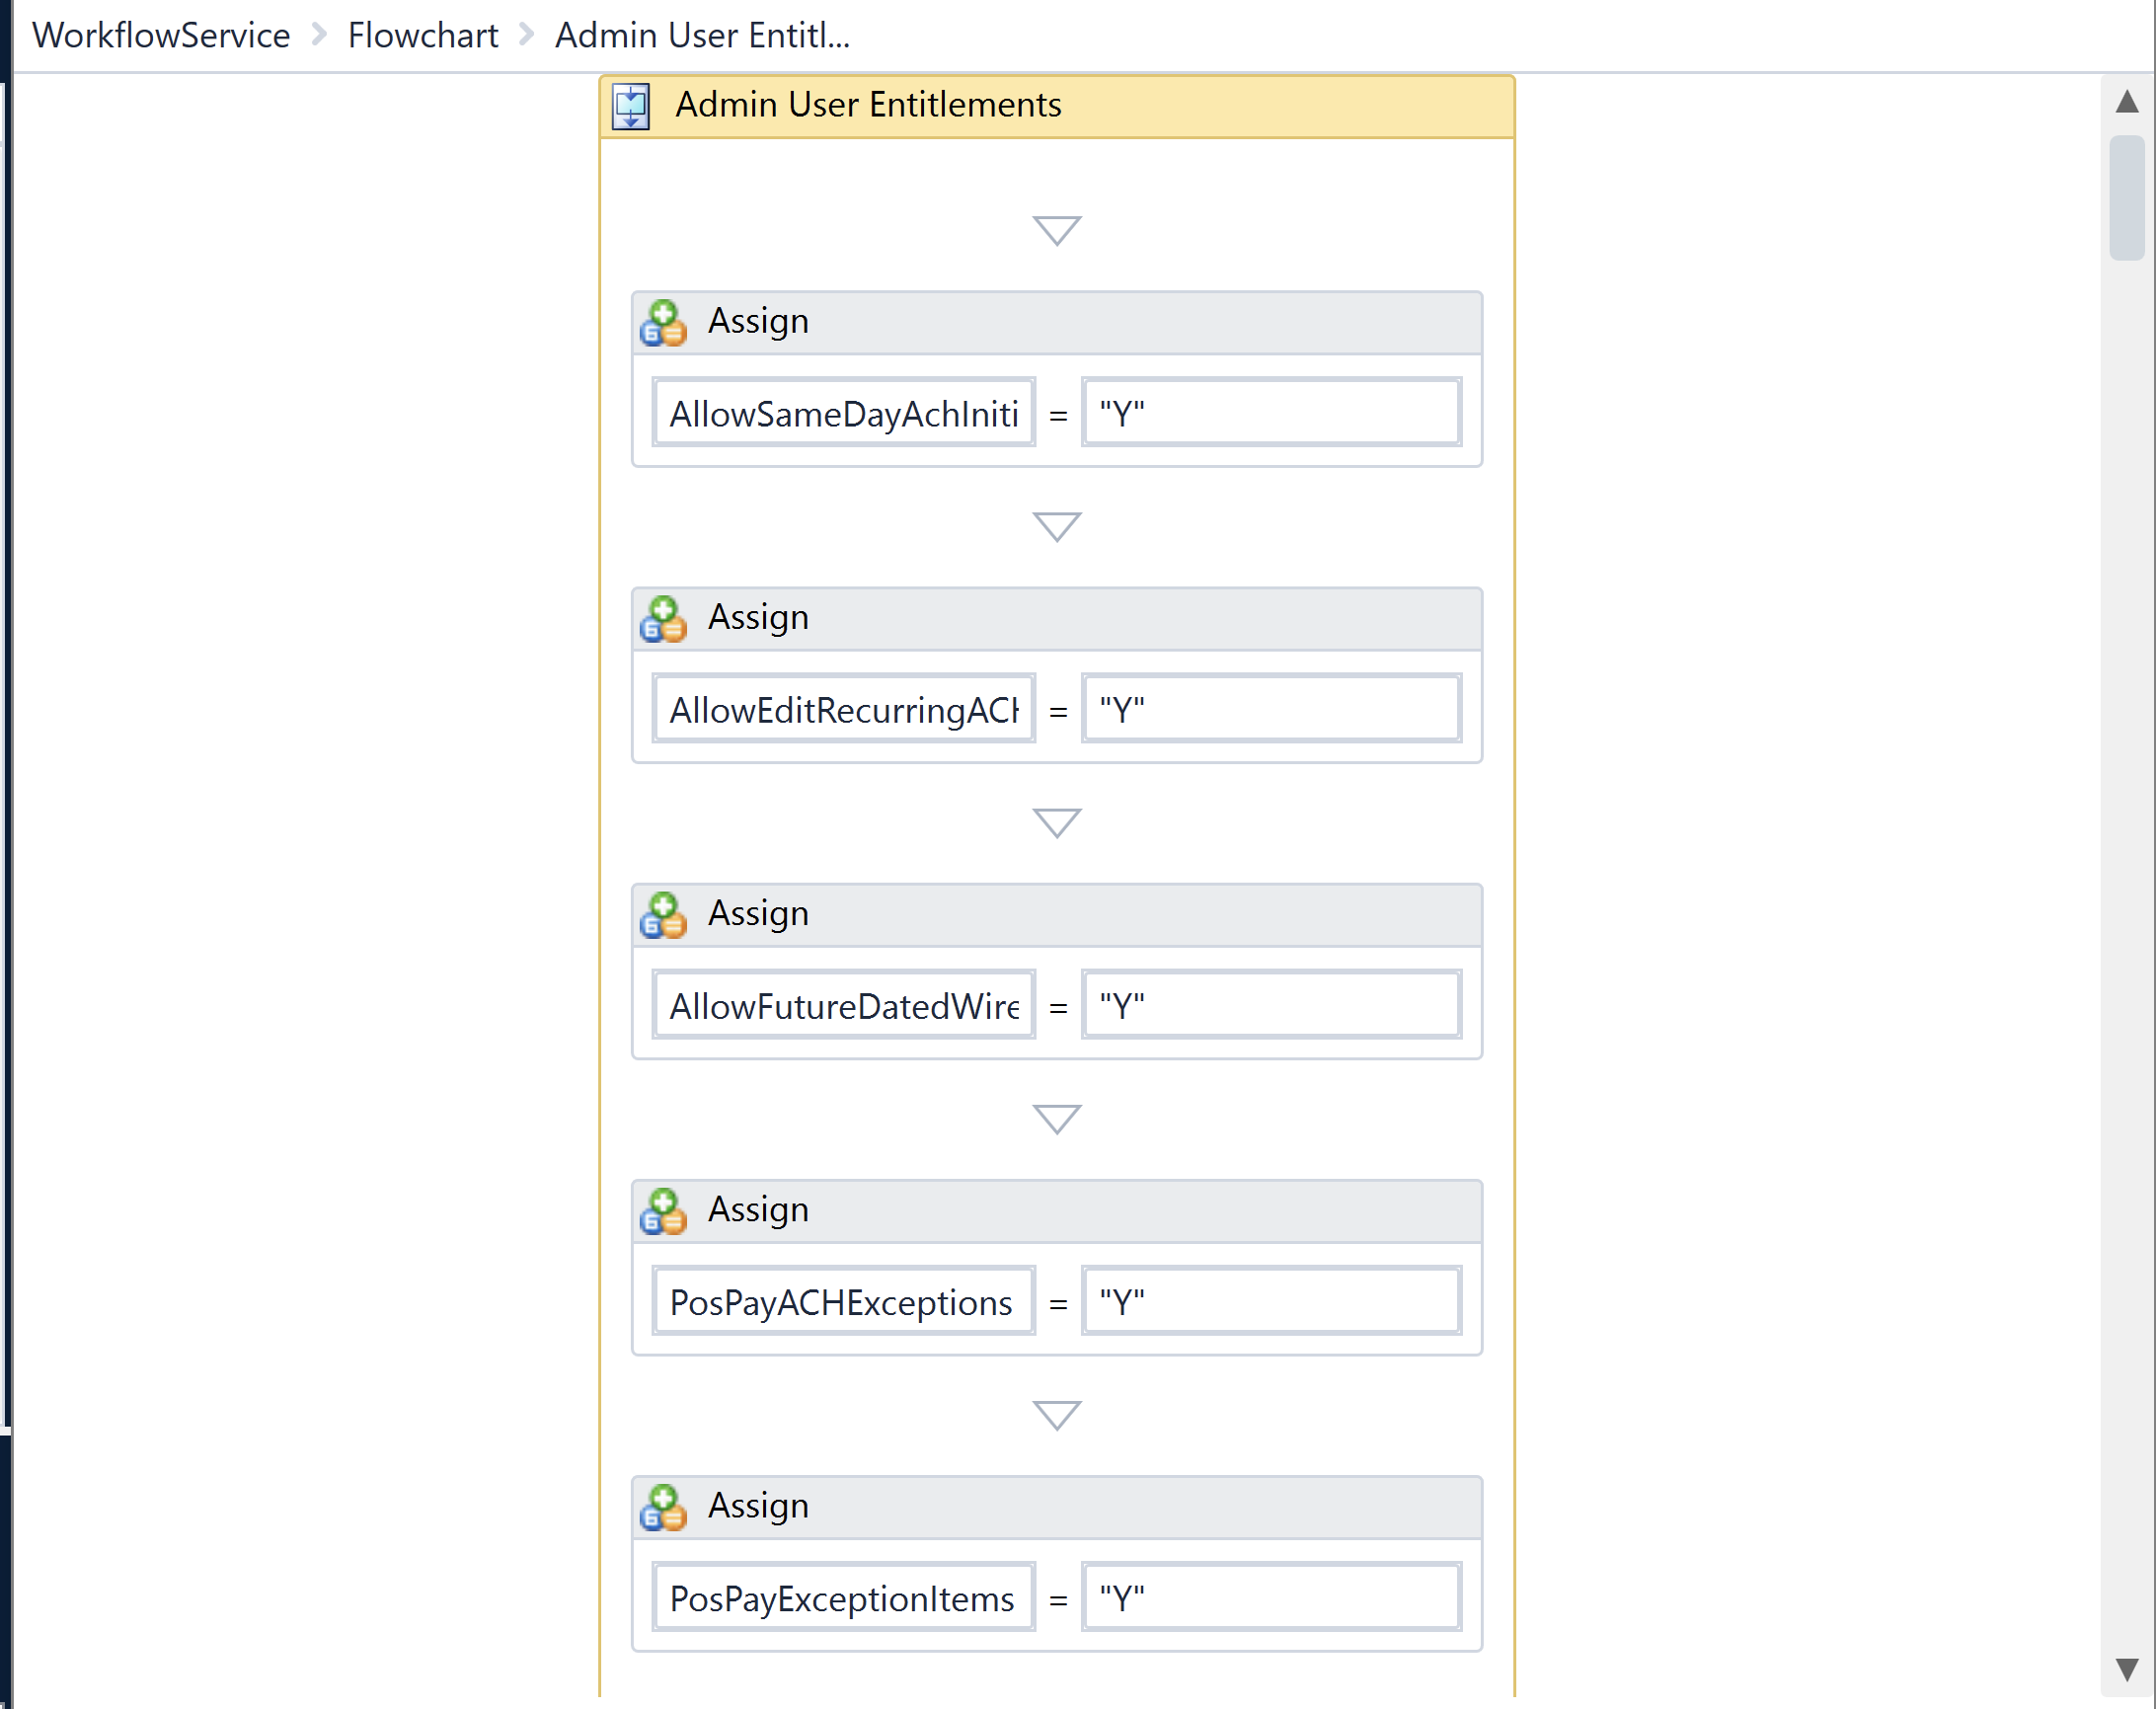
- “AllowSameDayAchInitiation”
- Values control whether the user is allowed to perform Same Day ACH Initiation.
- Banno Map: User permissions > Initiate Same Day ACH
- NTBO Map: User Settings > Initiate Same Day ACH
- Core Map: AllowSameDayAchInitiation
- “AllowEditRecurringACH”
- Values control whether the user is allowed to edit recurring ACH payments.
- Banno Map: User permissions > Recurring ACH
- NTBO Map: User Settings > Recurring ACH
- Core Map: AllowEditRecurringACH
- “AllowFutureDatedWires”
- Values control whether the user is allowed to create future dated wires.
- Banno Map: User permissions > Transmit Future-Dated Wires
- NTBO Map: Default Settings > Enter Future-Dated Wires
- Core Map: N/A
- “Transfers”
- Values control whether the user is allowed to perform transfers.
- Banno Map: User permissions > Allow Transfers
- NTBO Map: Default Settings > Transfers
- Core Map: User Settings > Transfers
- “WorkACH”
- Values control whether the user has access to work ACH items.
- Banno Map: User permissions > Edit/Create ACH Control > Full edit/create
- NTBO Map: User Settings > Work with ACH
- Core Map: User Settings > Work with ACH
- “DefineNonRepWires”
- Values control whether the user is allowed to create one-time wires.
- Banno Map: User permissions > Create One-Time Wires
- NTBO Map: Default Settings > Define Non-Rep Wires
- Core Map: Wire Company > Employee > Enter/Request Single Wires
- “Display”
- Values control whether the user has access to view ACH batches.
- Banno Map: User permissions > View ACH
- NTBO Map: User Settings > Display ACH
- Core Map: User Settings > Display ACH
- “EditNonRepWires”
- Values control whether the user is allowed to edit single, non-repetitive wires.
- Banno Map: User permissions > Edit One-Time Wires
- NTBO Map: Default Settings > Edit Non-Rep Wires
- Core Map: Wire Company > Employee > Edit Single Wires
- “Initiate”
- Values control whether the user is allowed to initiate ACH batches.
- Banno Map: User permissions > Initiate ACH
- NTBO Map: User Settings > Initiate ACH
- Core Map: User Settings > Initiate ACH
- “DefineRepWires”
- Values control whether the user is allowed to create wire templates/repetitive wires.
- Banno Map: User permissions > Create Wire Templates
- NTBO Map: Default Settings > Define Rep Wires
- Core Map: Wire Company > Employee > Enter/Request Repetitive Wires
- “StopInquiry”
- Values control whether the user is allowed to view existing stop payments.
- Banno Map: User permissions > View Stop Payment
- NTBO Map:
Default Settings > Stop Inquiry
Account Settings > Stop Inquiry - Core Map: User Settings > Stop payment inquiry
- “UploadACH”
- Values control whether the user is allowed to upload ACH files.
- Banno Map: User permissions > Upload ACH File
- NTBO Map: User Settings > Upload ACH
- Core Map: User Settings > Upload ACH
- “EditRepWires”
- Values control whether the user is allowed to edit wire templates/repetitive wires.
- Banno Map: User permissions > Edit Wire Templates
- NTBO Map: Default Settings > Edit Rep Wires
- Core Map: Wire Company > Employee > Edit Repetitive Wires
- “StopAdditions”
- Values control whether the user is allowed to add stop payments.
- Banno Map: User permissions > Add Stop Payment
- NTBO Map:
Default Settings > Stop Additions
Account Settings > Stop Additions - Core Map: User Settings > Stop payment additions
- “TransmitWires”
- Values control whether the user is allowed to transmit wires.
- Banno Map: User permissions > Transmit Wires
- NTBO Map: Default Settings > Transmit Wires
- Core Map: Wire Company > Employee > Transmit NetTeller Wires
- “Administration”
- Values on the right hand side of this assign can be “Y”, “N”, “P”, or “V”.
- A “Y” value allows access to administrative rights.
- A “N” value does not allow access to administrative rights.
- A “P” value allows access to partial admin rights. (Cannot create/edit users or enroll company in ESI.)
- A “V” allows only view access to admin settings.
- Banno Map: User role > Admin
- NTBO Map: User Settings > Administration
- Core Map: User Settings > Administration
- Values on the right hand side of this assign can be “Y”, “N”, “P”, or “V”.
- “ViewClubAccounts”
- Values control whether the user is allowed to view club account types.
- Banno Map: N/A
- NTBO Map: N/A
- Core Map: User Settings > Club accounts
- “ViewLoanAccounts”
- Values control whether the user is allowed to view loan account types.
- Banno Map: N/A
- NTBO Map: N/A
- Core Map: User Settings > Loan accounts
- “ViewDemandAccounts”
- Values control whether the user is allowed to view DDA account types.
- Banno Map: N/A
- NTBO Map: N/A
- Core Map: User Settings > Demand accounts
- “ViewTimeDepositAccounts”
- Values control whether the user is allowed to view Time Deposit account types.
- Banno Map: N/A
- NTBO Map: N/A
- Core Map: User Settings > Time deposit accounts
- “ViewSavingsAccounts”
- Values control whether the user is allowed to view Savings accounts types
- Banno Map: N/A
- NTBO Map: N/A
- Core Map: User Settings > Savings accounts
- “ViewIRAAccounts”
- Values control whether the user is allowed to view IRA account types
- Banno Map: N/A
- NTBO Map: N/A
- Core Map: User Settings > IRA accounts
- “ViewSafeBoxAccounts”
- Values control whether the user is allowed to view Safe Deposit Box account types
- Banno Map: N/A
- NTBO Map: N/A
- Core Map: User Settings > Safe box accounts
- “ViewNonJHAAccounts”
- Values control whether the user is allowed to view account types added by the bank within the NONJHAPP menu.
- Banno Map: N/A
- NTBO Map: N/A
- Core Map: User Settings > Non-JHA accounts
- “ViewRecon”
- Values control whether the user is allowed to view account reconciliation items.
- Banno Map: N/A
- NTBO Map: N/A
- Core Map: User Settings > Recon exceptions
- “DownloadARPFile”
- Values control whether the user is allowed to download ARP files.
- Banno Map:
User permissions > Download ARP
User account permissions > Download ARP - NTBO Map:
Default Settings > Download ARP File
Account Settings > Download ARP File - Core Map: User Settings > Download ARP File
- “FullACHControl”
- Values control whether the user is allowed to access all ACH functionality.
- Banno Map: User permissions > Full ACH Control
- NTBO Map: User Settings > Full ACH Control
- Core Map: User Settings > Full ACH Control
- “WorkARPItems”
- Values control whether the user is allowed to work with ARP items.
- Banno Map:
User permissions > Work Positive Pay
User account permissions > Work Positive Pay - NTBO Map:
Default Settings > Work ARP Items
Account Settings > Work ARP Items - Core Map: User Settings > Work ARP exceptions
- “UploadARPFile”
- Values control whether the user is allowed to upload ARP files.
- Banno Map:
User permissions > Upload Positive Pay
User account permissions > Upload Positive Pay - NTBO Map:
Default Settings > Upload ARP Items
Account Settings > Upload ARP Items - Core Map: User Settings > Upload ARP
- “DualControlForWires”
- Values control whether the user has the ability to require a second user to approve transmitted wires.
- Banno Map: User permissions > Dual Wire Control
- NTBO Map: N/A
- Core Map: Wire Company > Employee > Dual Control Required
- “TransmitWire”
- Values control whether the user is allowed to transmit wires.
- Banno Map: User permissions > Transmit Wires
- NTBO Map: Default Settings > Transmit Wires
- Core Map: Wire Company > Employee > Transmit NetTeller Wires
- “WorkWithWires”
- Values control whether the user is allowed to work with wires.
- Banno Map: User permissions > Work with Wires
- NTBO Map: N/A
- Core Map: User Settings > Works with wires
- “ACHExceptions”
- Values control whether the user is allowed to work ACH exceptions.
- Banno Map:
User permissions > Work ACH Exceptions
User account permissions > Work ACH Exceptions - NTBO Map:
Default Settings > Work ACH Exceptions
Account Settings > Work ACH Exceptions - Core Map: User - ACHExceptions Account - WorkACHExceptions
- “DeleteACH”
- Values control whether the user is allowed to delete ACH batches.
- Banno Map: User permissions > Batch Delete
- NTBO Map: User Settings > Delete ACH
- Core Map: N/A
- “RestrictedBatch”
- Values control whether the user is allowed to access restricted ACH batches.
- Banno Map: User permissions > Restricted Batch Access
- NTBO Map: User Settings > Restricted Batch Access
- Core Map: N/A
- “ImportTransactions”
- Values control whether the user is allowed to import ACH recipients.
- Banno Map: User permissions > Import Recipients
- NTBO Map: User Settings > Import Transaction
- Core Map: N/A
- “NoBalanceView”
- Values control whether the user can see the account balance.
- Banno Map: Account permissions > Hide account (COMING SOON)
- NTBO Map: Default Settings > No Balance View
- Core Map: N/A
- “QuickEditOnly”
- Values control whether the user is allowed to only edit the amount and addenda on ACH batches.
- Banno Map: User permissions > Edit/Create ACH Control > Partial Edit
- NTBO Map: User Settings > Quick Edit ACH Only
- Core Map: N/A
- “CreateRecurringWires”
- Values control whether the user is allowed to create and transmit recurring wires.
- Banno Map: User permissions > Transmit Recurring Wires
- NTBO Map: Default Settings > Define Recurring Wires
- Core Map: Wire Company > Employee > Enter/Request Recurring Wires
- “EditRecurringWires”
- Values control whether the user is allowed to edit recurring wires.
- Banno Map: User permissions > Edit Recurring Wires
- NTBO Map: Default Settings > Edit Recurring Wires
- Core Map: Wire Company > Employee > Edit Recurring Wires
- “TransferLimit”
- Values on the right hand side of this assign must include two integers after the decimal. (Ex. $123.45) This amount reflects user’s transfer limit.
- Banno Map: User permissions > Transfer Limit
- NTBO Map: User Settings > Transfer limit
- Core Map: N/A
NetTeller-Only Variables
The following variables are not used in Banno Business but may still be honored in NetTeller Cash Management:
- “StatementInquiry”
- Values control whether the user is allowed to view statements in NTCM
- Banno Map: NOT USED
- NTBO Map:
Default Settings > Statement Inquiry
Account Settings > Statement Inquiry - Core Map: User Settings > Statement inquiry
- “CurrentDayBalance”
- Values control whether the user is allowed to view current day balance report.
- Banno Map: NOT USED
- NTBO Map:
Default Settings > Current Day Balance
Account Settings > Current Day Balance - Core Map: User Settings > Current day balance
- “PriorDayBalance”
- Values control whether the user is allowed to view the prior day balance report.
- Banno Map: NOT USED
- NTBO Map:
Default Settings > Prior Day Balance
Account Settings > Prior Day Balance - Core Map: User Settings > Prior day balance
- “TransactionInquiry”
- Values control whether the user is allowed to view transactions.
- Banno Map: NOT USED
- NTBO Map:
Default Settings > Transaction Inquiry
Account Settings > Transaction Inquiry - Core Map: User Settings > Transaction inquiry
- “TransactionRangeInquiry”
- Values control whether the user is allowed to view transactions by specific range criteria including, date, amount, check, etc.
- Banno Map: NOT USED
- NTBO Map: N/A
- Core Map: User Settings > Transaction range inquiry
- “ViewRates”
- Values control whether the user is allowed to view rates for the banks products as seen in NETPAR Option 6.
- Banno Map: N/A
- NTBO Map: N/A
- Core Map: User Settings > Rates
- “BillPay”
- Values control whether the user is allowed to work with NetTeller’s Bill Pay product.
- Banno Map: NOT USED
- NTBO Map:
Default Settings > Bill Pay
Account Settings > Bill Pay - Core Map: User Settings > Bill Pay
- “OrderChecks”
- Values control whether the user is allowed to order checks.
- Banno Map: NOT USED
- NTBO Map: Account Settings > Order Checks
- Core Map: N/A
- “ESEnrollment”
- Values control whether the user is allowed to enroll in e-statements in NTCM.
- Banno Map: NOT USED
- NTBO Map: Default Settings > ES
- Core Map: N/A
Variables Not In Use
These workflow variables are not currently in use:
- Download
- FullWireControl
- PassportCard
- PosPayACHExceptions
- PosPayExceptionItems
- PosPayMaintenance
- RecurringWires
- UpdateTransactions
- UploadPosPay
- UploadRecon
- ViewODPAccounts
- WorkPosPay
Adding Workflow Steps to Existing Workflows
Jack Henry Enterprise Workflow allows for existing workflow steps to be copied and pasted to other workflows.
- Open both workflow definitions that you will be working with.
- On the workflow definition you will be copying from, locate the steps you would like to copy. Click above and to the left of the first step you will be copying, then drag your mouse down to the bottom right side of the final step you wish to copy. Use Control+C to copy.
- Go to the Workflow Definition you wish to paste steps to. Locate the general area of the definition you would like to paste the steps to and use Control+V to paste.
- Connect arrows from the existing definition to the first pasted step, then connect the last pasted step to the next available previously existing step.
Additional Customization
Should additional customization be required, customization can be done by modifying the workflow definition. The Enterprise Workflow Consulting team can also assist with customization requests upon purchase of a block of hours for consulting services. Please email Casey Geist at CaGeist@jackhenry.com for more information.
Banno Business API Listing
Additional technical specifications will be added to jackhenry.dev soon. This will be announced via Service Level Announcements (SLAs) and For Clients Portal when available.
POST /organization/enroll
This API will create a new NetTeller ID and automatically enroll the organization in Banno Business.
POST /cashmanagementuser/create
This API will create a new cash management user and automatically enroll the user in Banno Business.
POST /cashmanagementuser/entitlements
This API adds entitlements for the newly created cash management user.
POST /cashmanagementuser/enrollaccounts
This API adds all accounts that are associated to the NetTeller ID to the newly created cash management user.